Creating AI Avatars: Leap & Zapier No-Code Guide ⚡️
📝 Getting Started
In this guide, we’ll build a Lensa AI Avatars clone with Leap & Zapier using no-code in less than 30 minutes.
By the end of this guide, you will have a no-code workflow that takes user form submissions, generates magic AI avatars on Leap!
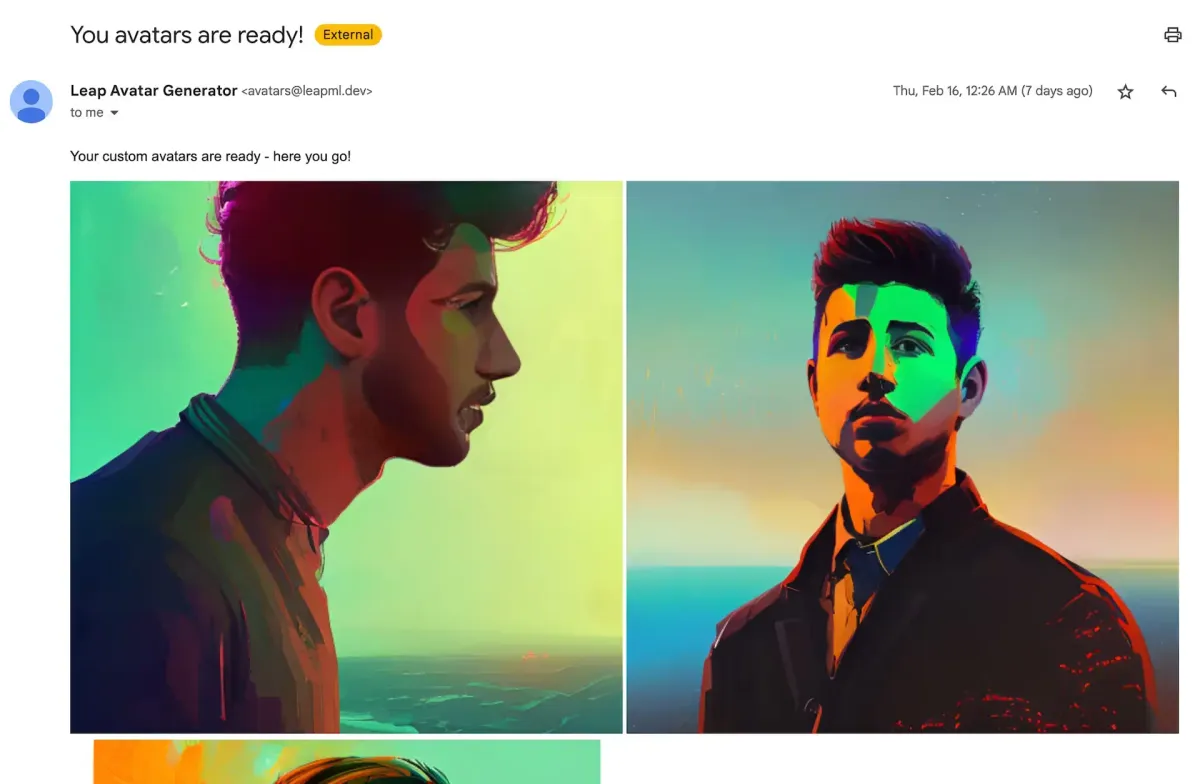
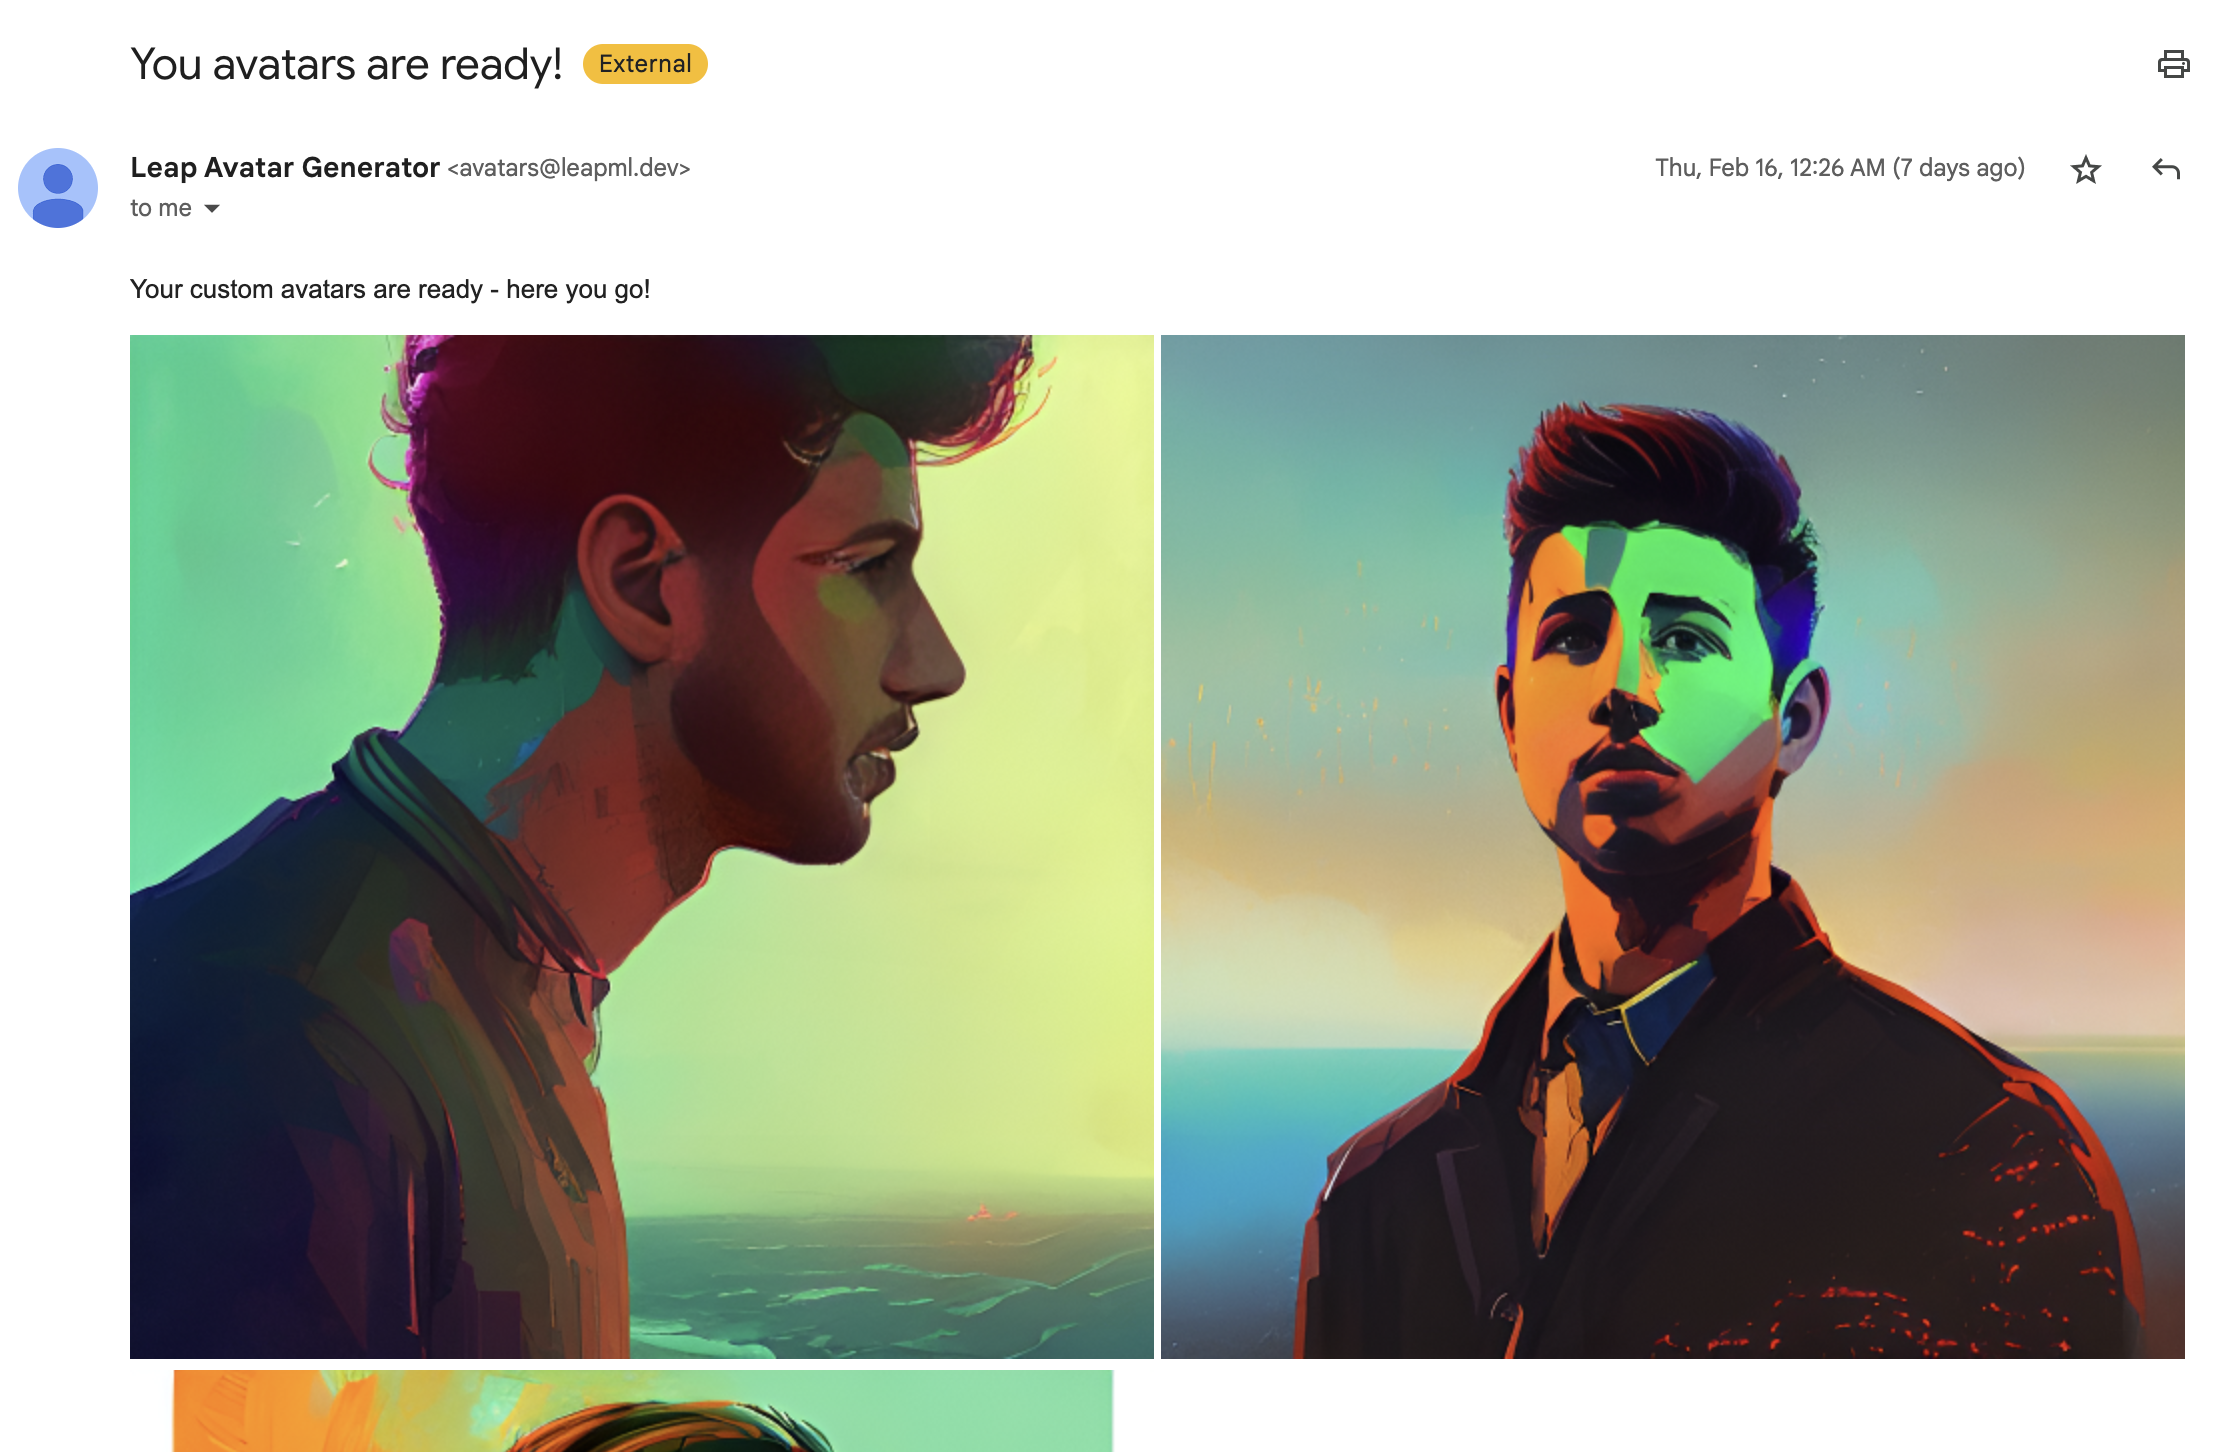
See the final results here:
A quick overview of what you'll need to get started:
- An account on https://www.leapml.dev/signup(opens in a new tab)
- An account on https://zapier.com(opens in a new tab)
And an overview of the steps we'll cover in this guide:
- Creating a Google Form
- Connecting Google Form to Leap
- Training A Model On Leap AI
- Saving Data To Google Sheets
- Generating Images When Training Is Complete
1️⃣ Creating a Google Form
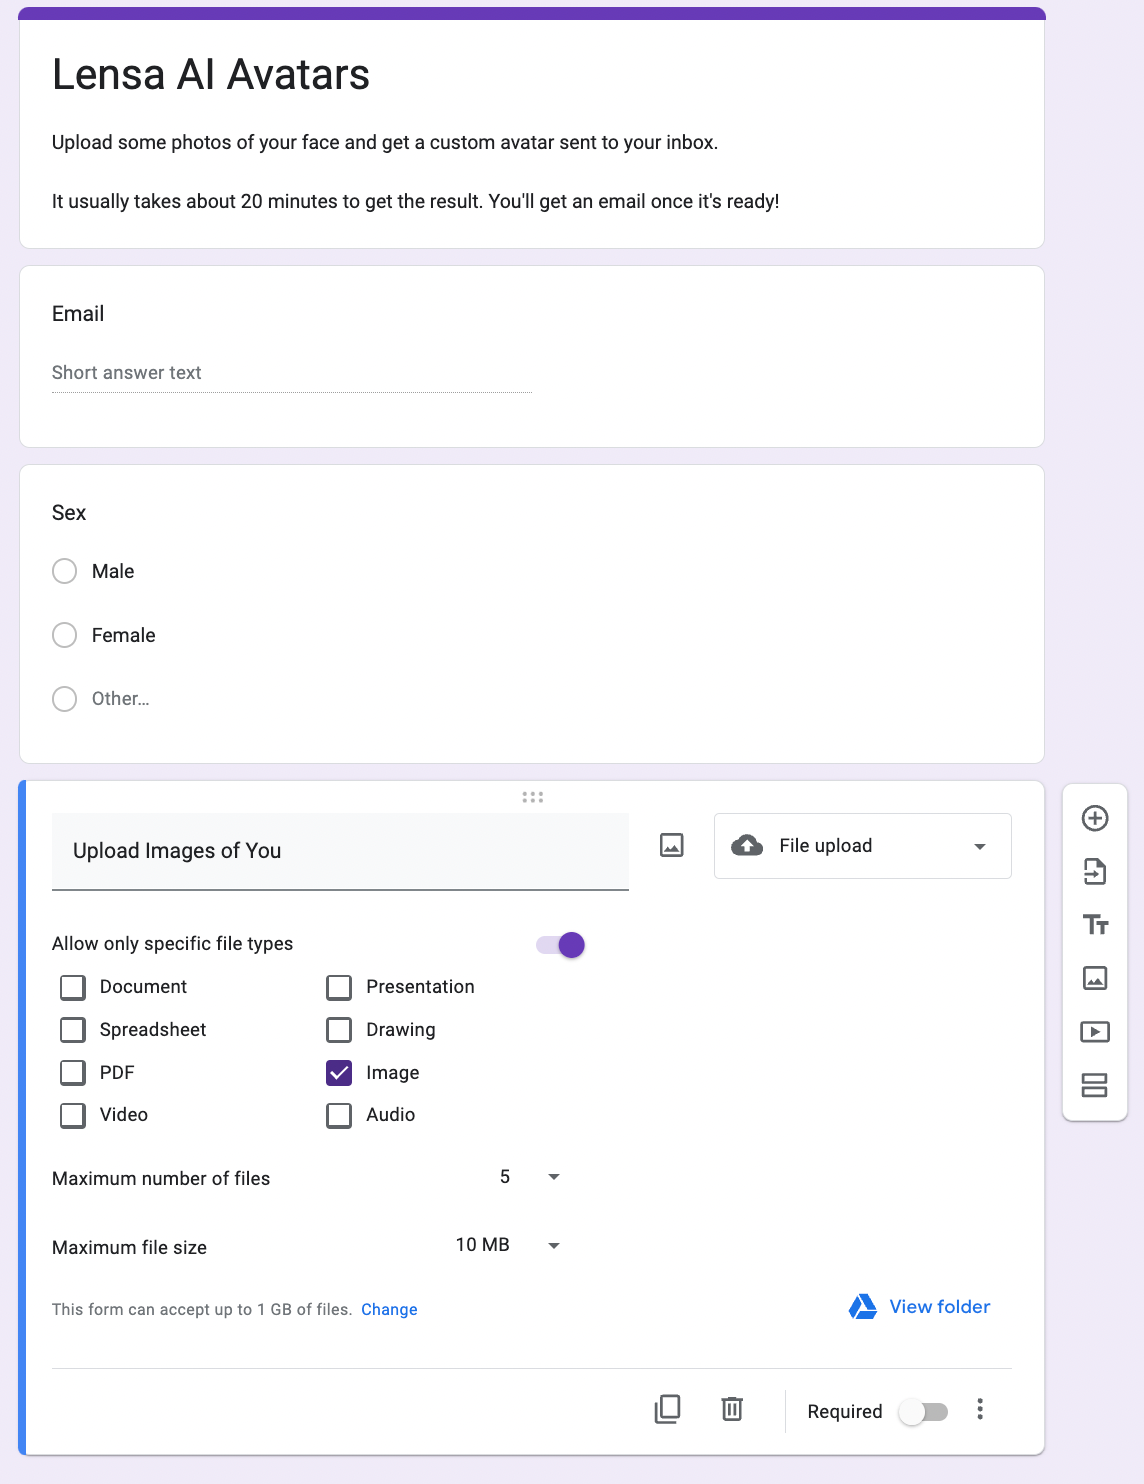
- To begin, log in to Google and create a new form
Add fields to collect a users email, gender, and sample images
2️⃣ Connecting Google Form to Leap AI
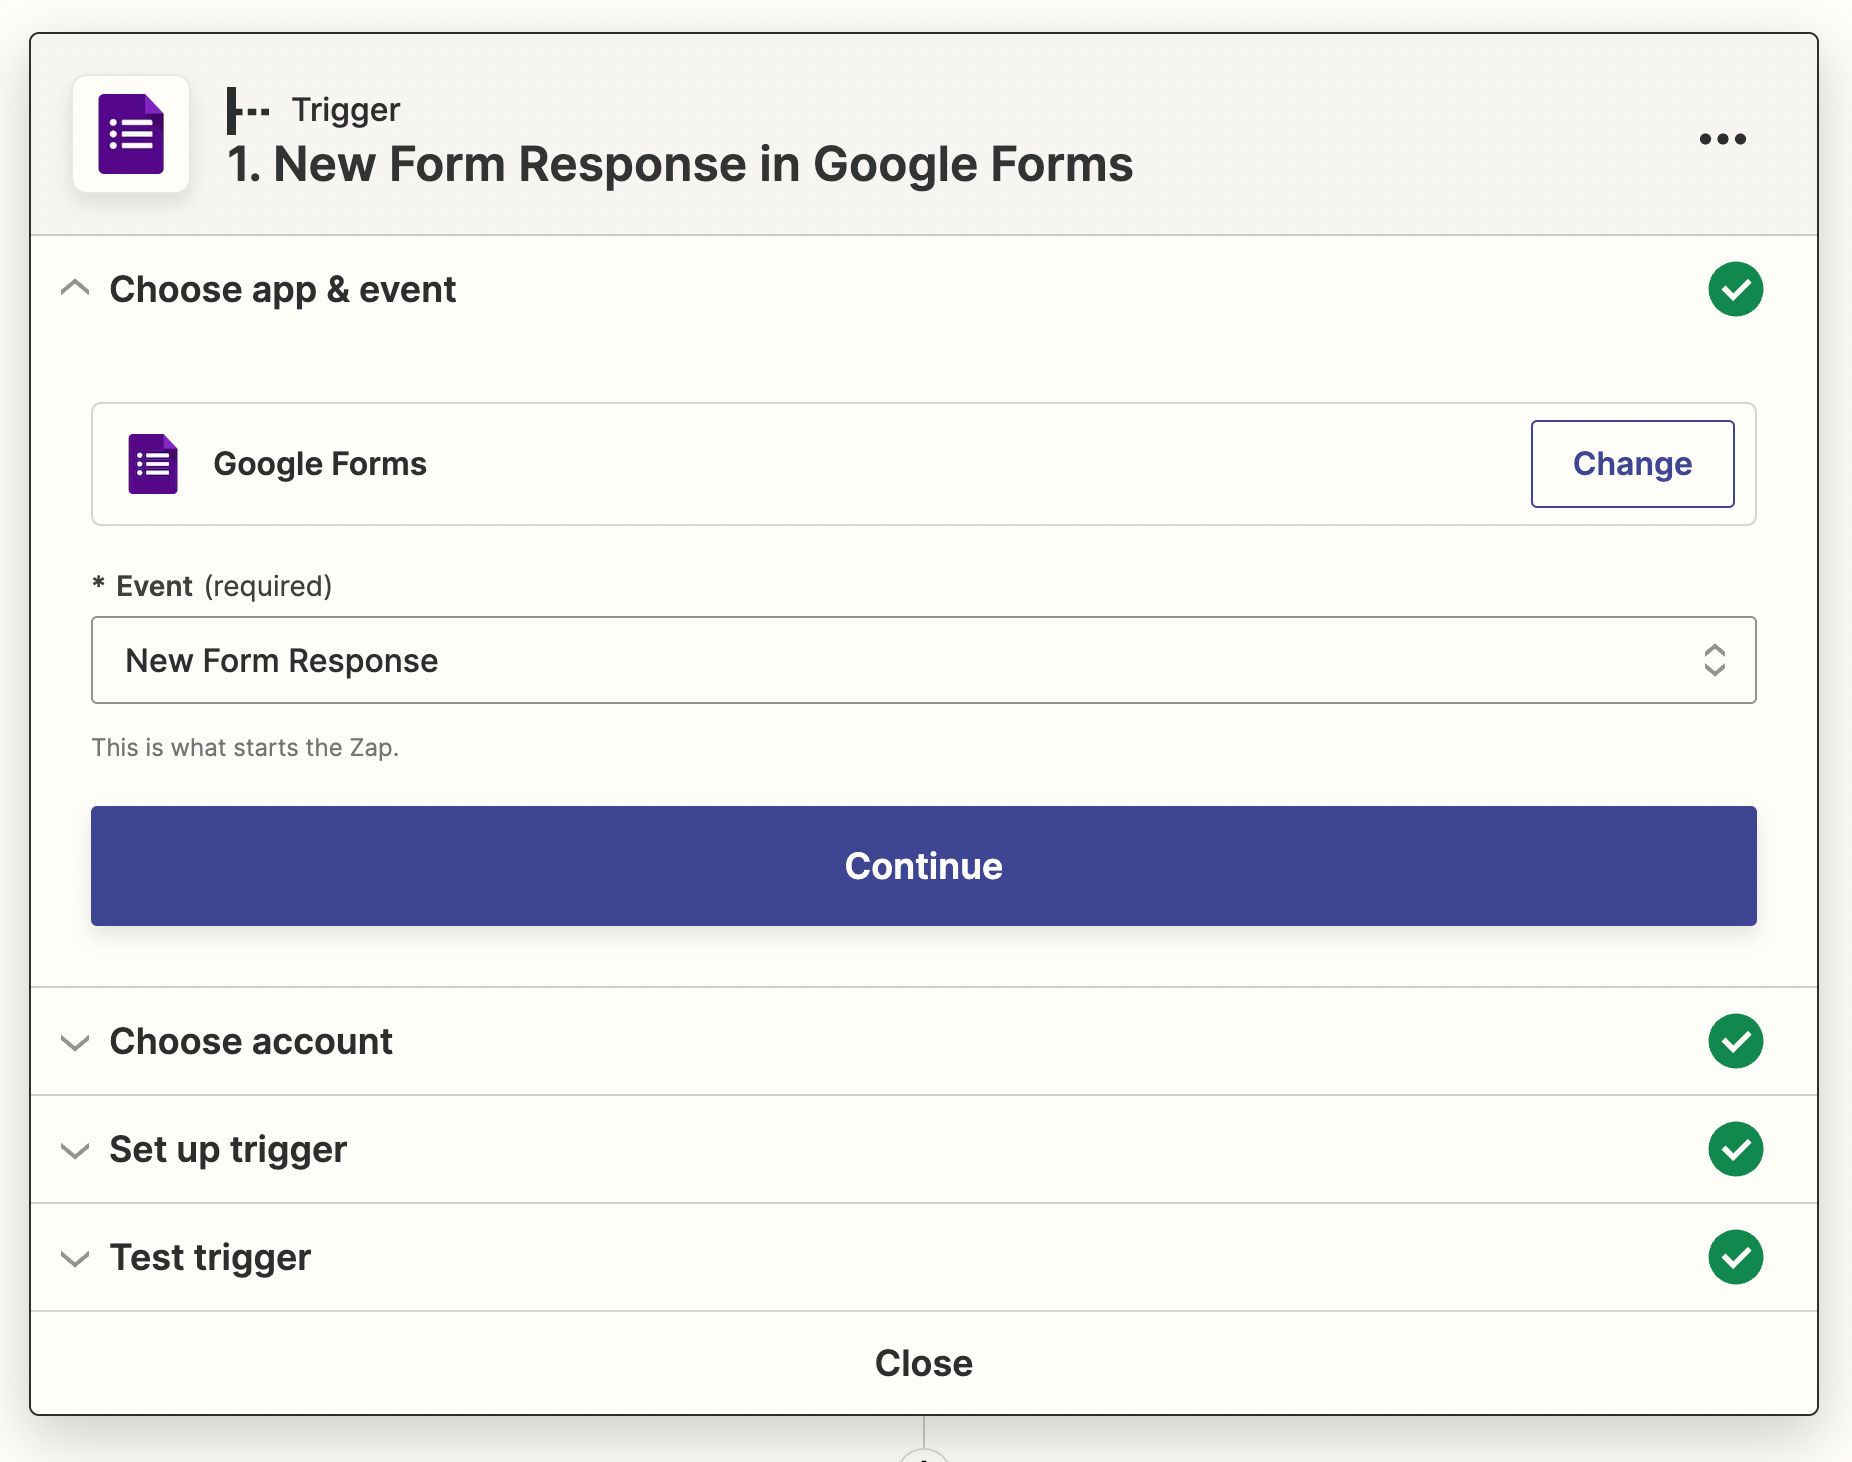
Log into Zapier and create your first step by connecting to the Google Form
Now, let’s add a second step to connect to Leap AI and create a new model

💡 Once connected, try to send a test Zap to create a model
3️⃣ Training A Model On Leap AI
- Once your create model Zap is working, we’ll add a 3rd action to take the image samples uploaded in the Google Form and use them to queue a training on Leap AI
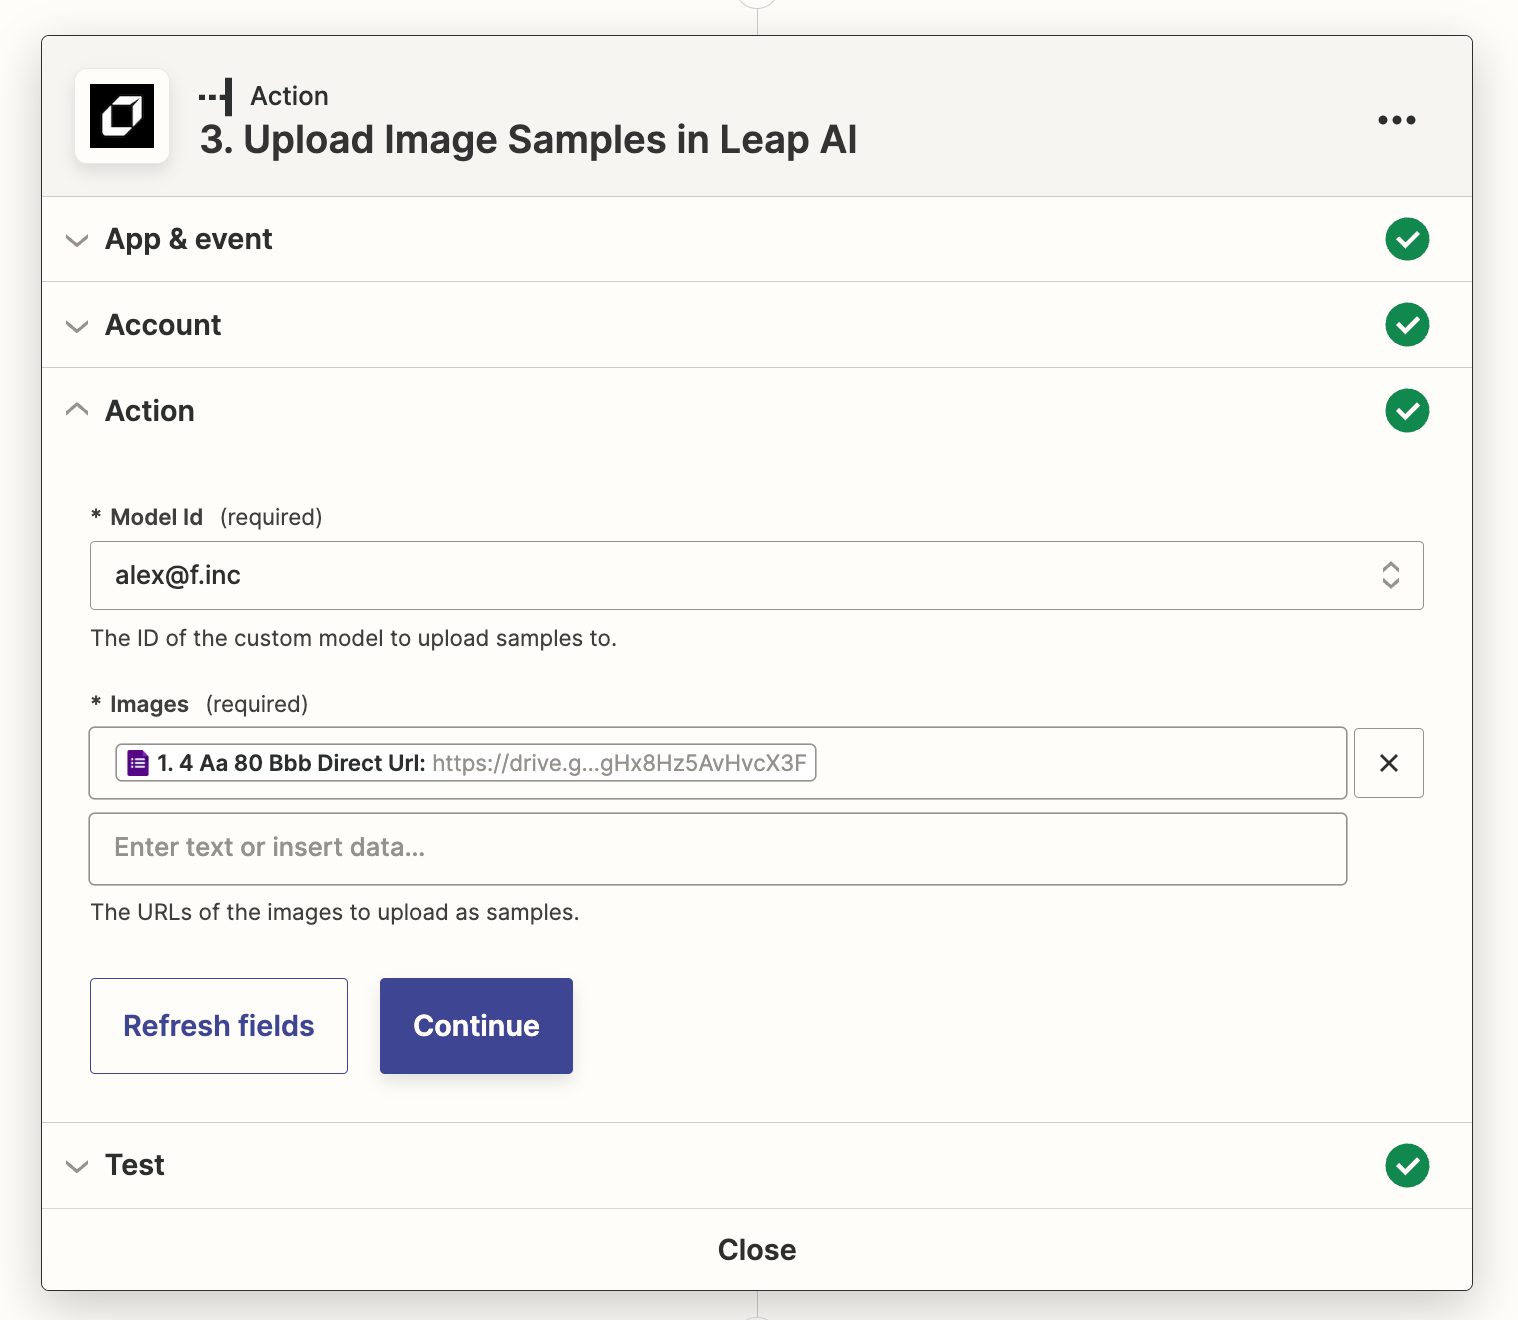
First Add An Action To Upload Image Samples in Leap AI
- Make sure you choose the “… Direct Url” url option for Images
- In my case it is “Aa 80 Bbb Direct Url”
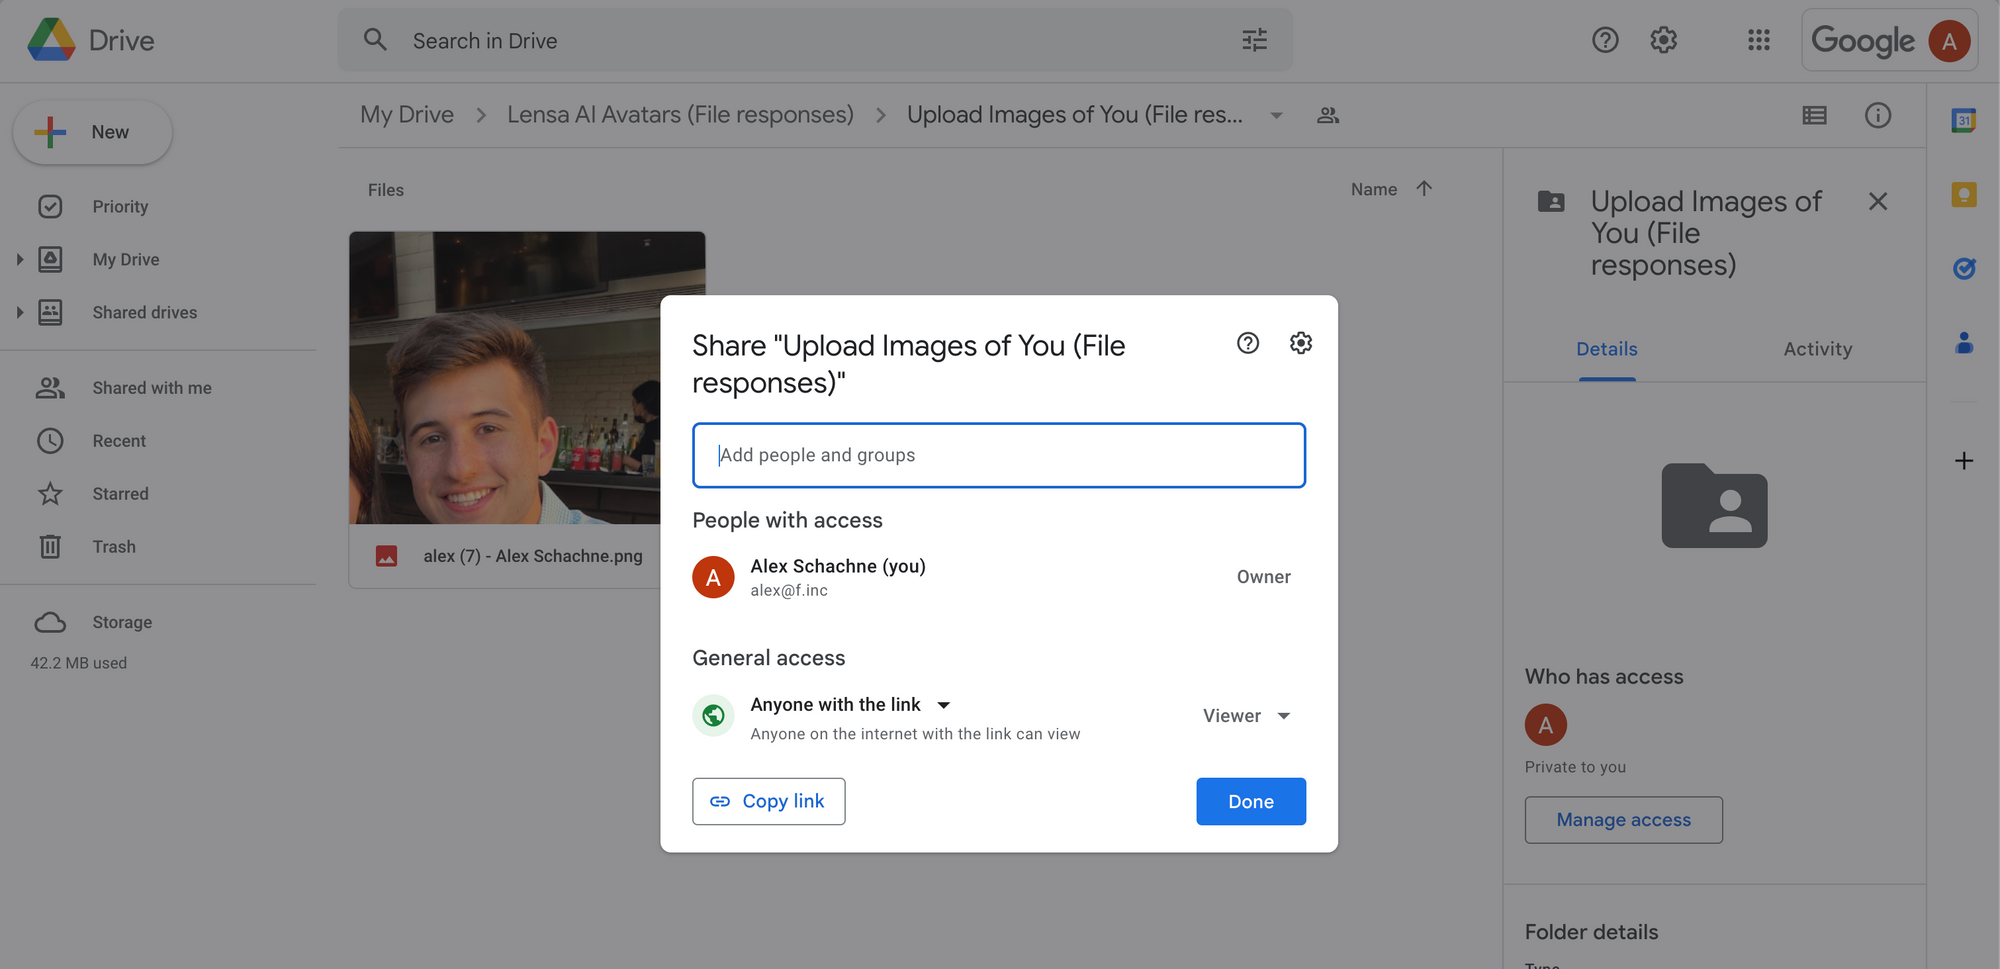
- Make sure you set the Google Drive folder where your images are uploaded to publicly viewable
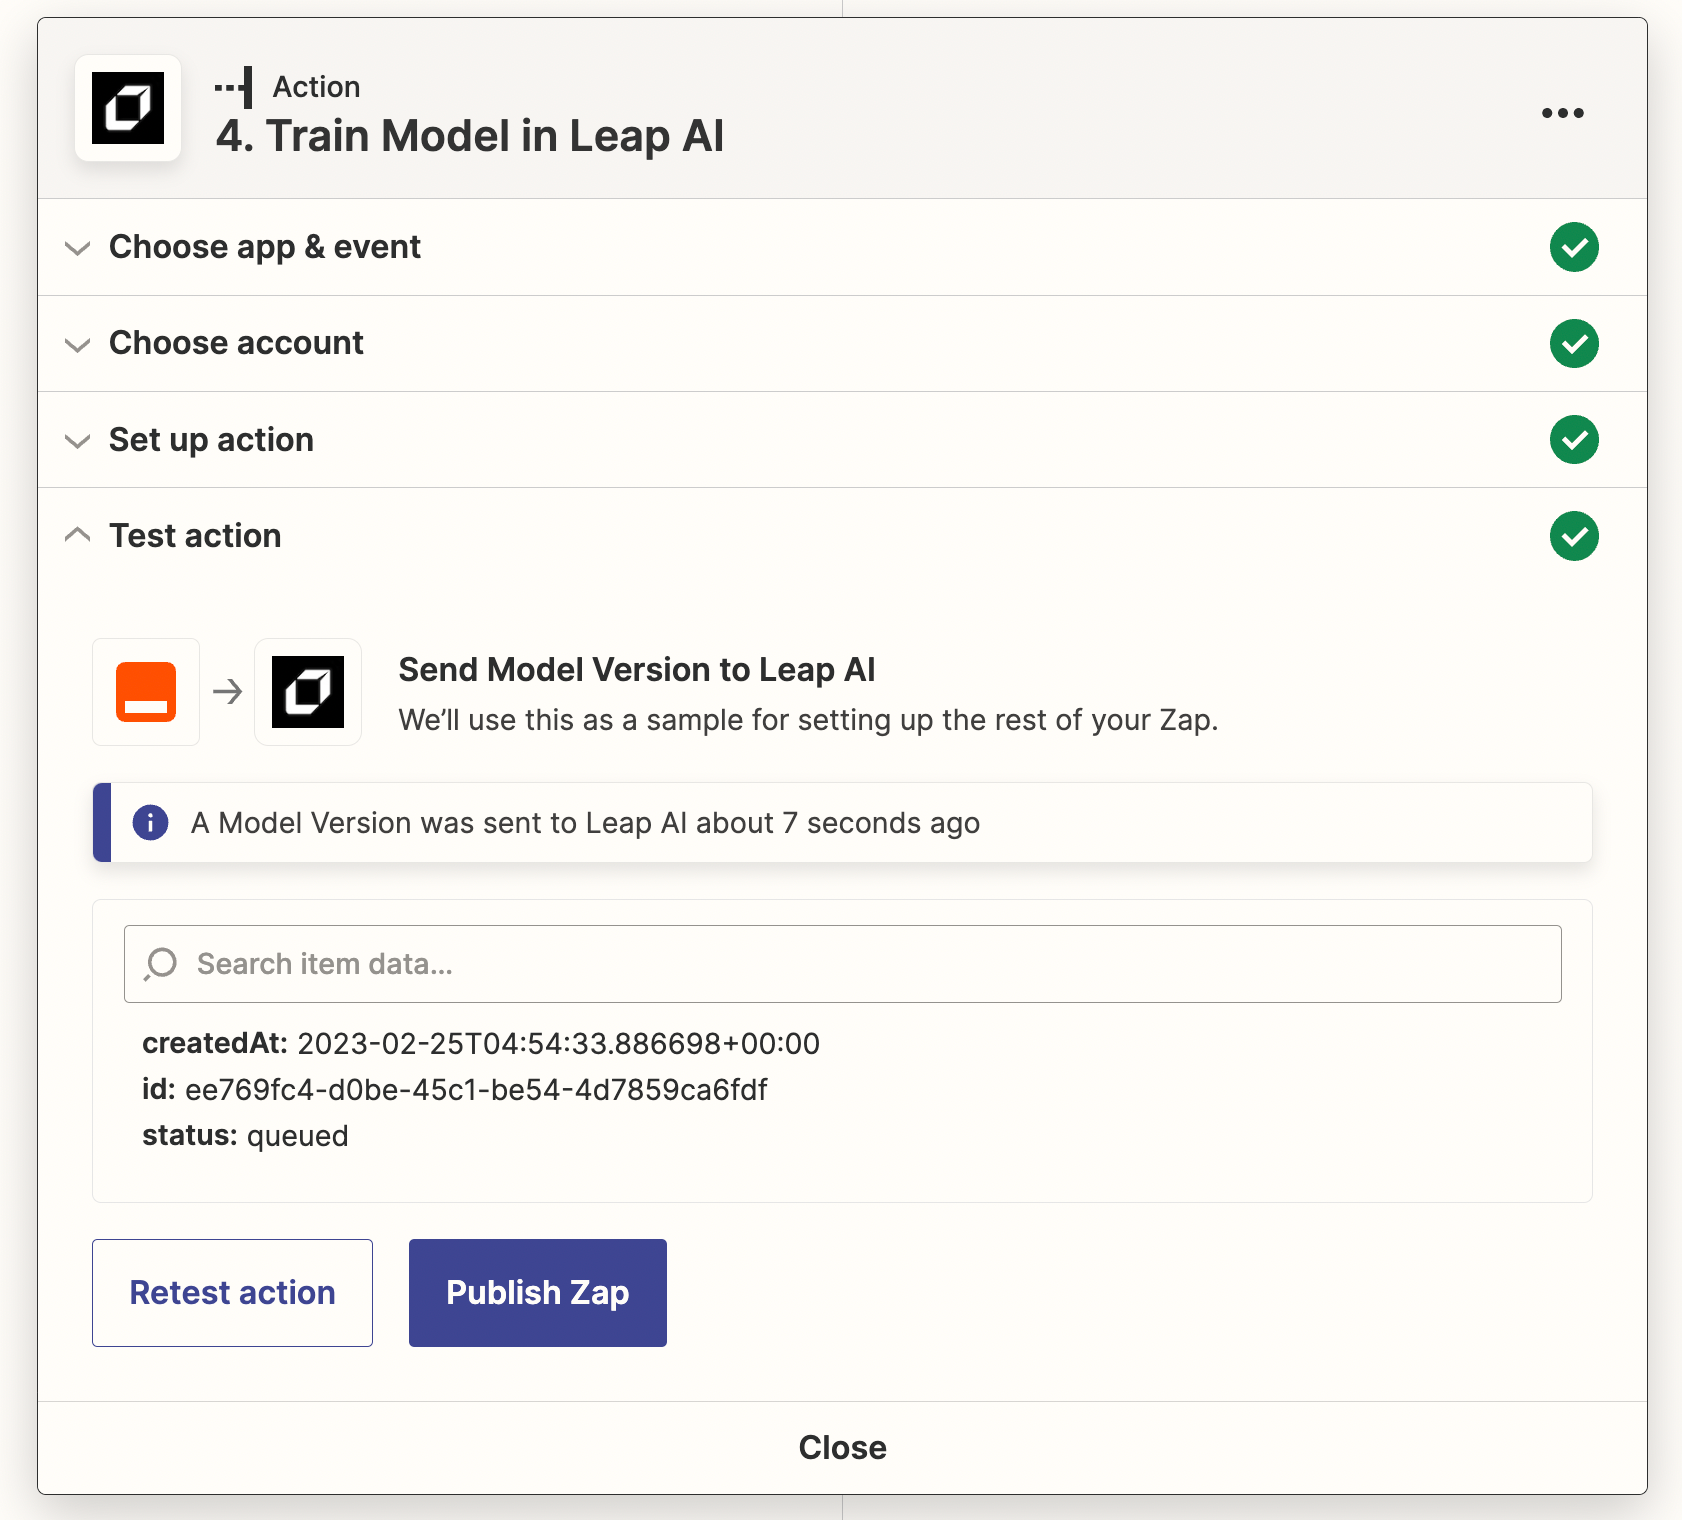
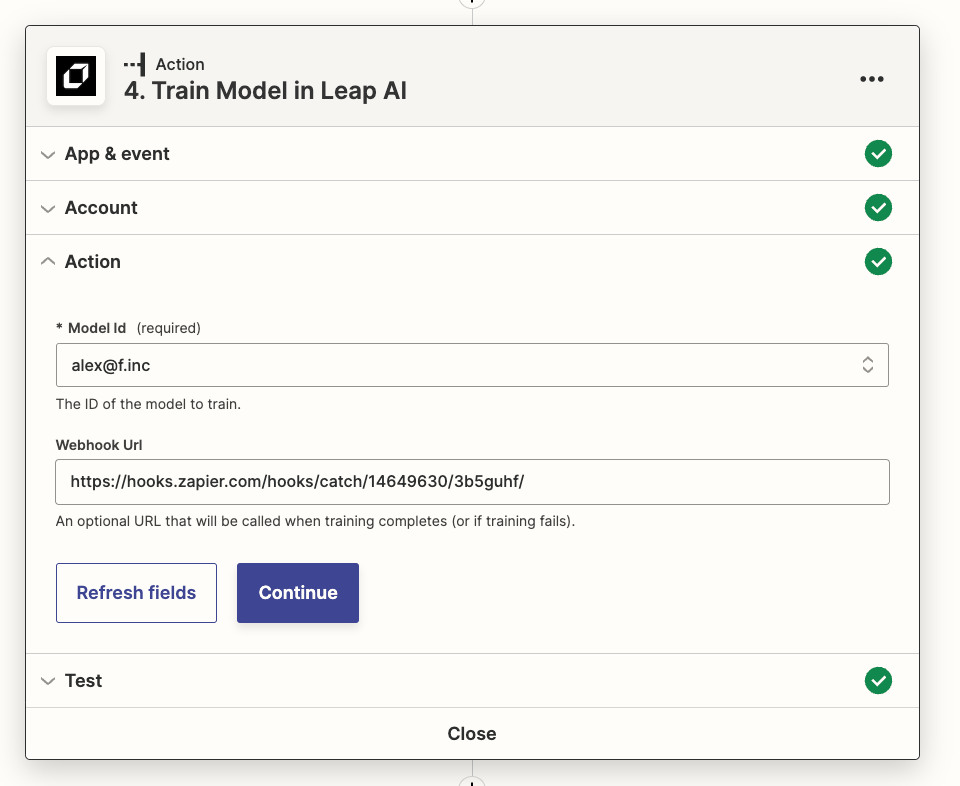
Next Train Model In Leap AI
4️⃣ Saving Data To Google Sheets
Now, we’ll add a 5th action to save our data and model information to Google Sheets in order to generate images from it once it is finished training
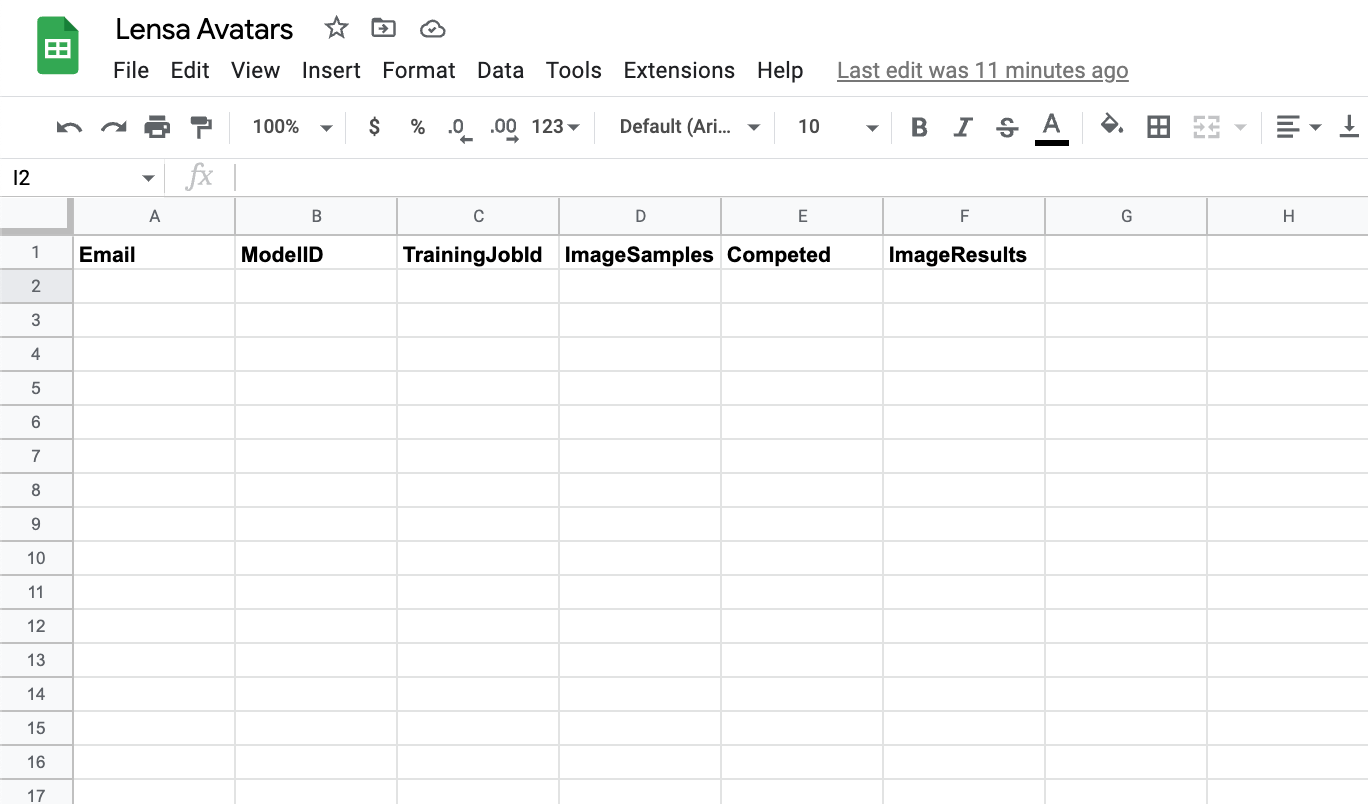
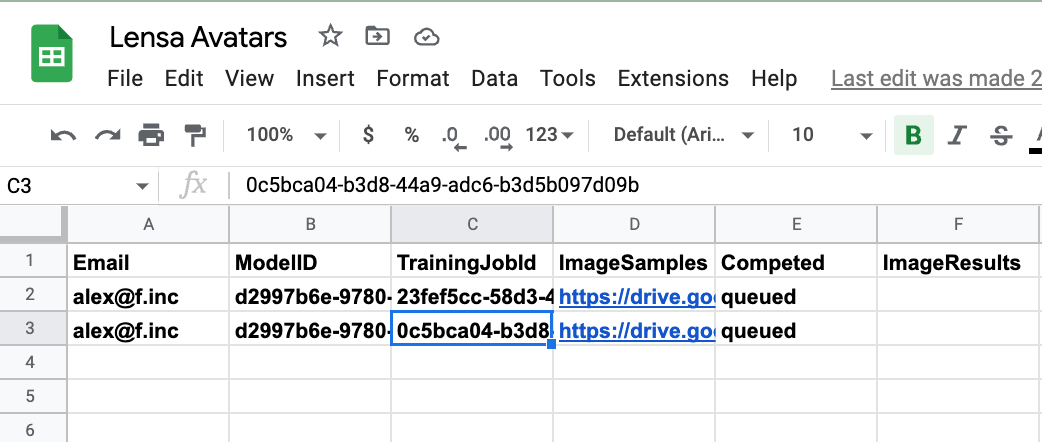
First, make a new spreadsheet where you will store your data with the following headers.
Next, choose the Google Sheets action and the Create New Row event (you may have to refresh for the new sheet you made to show up).
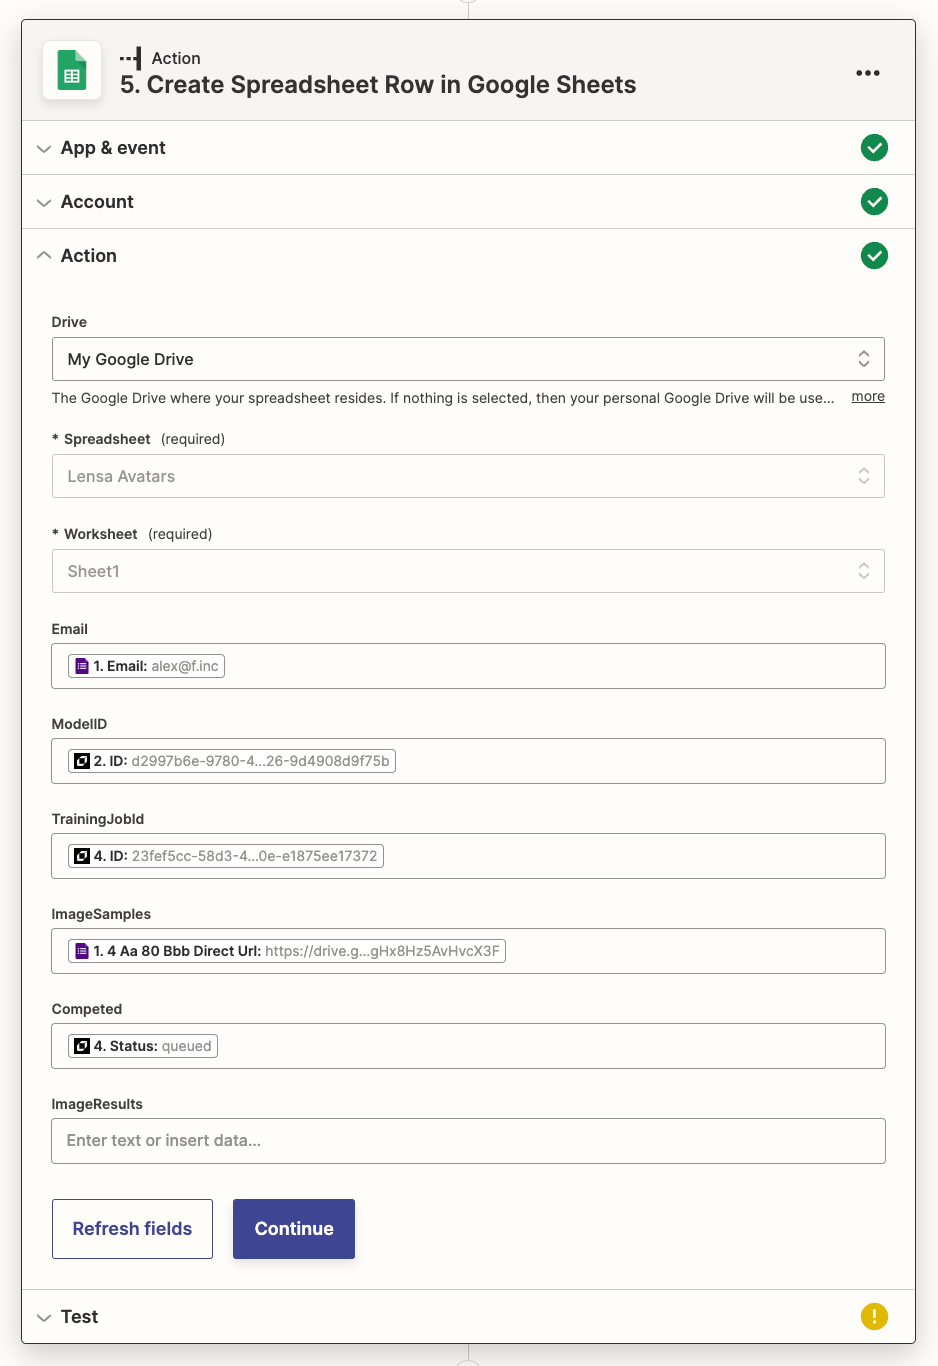
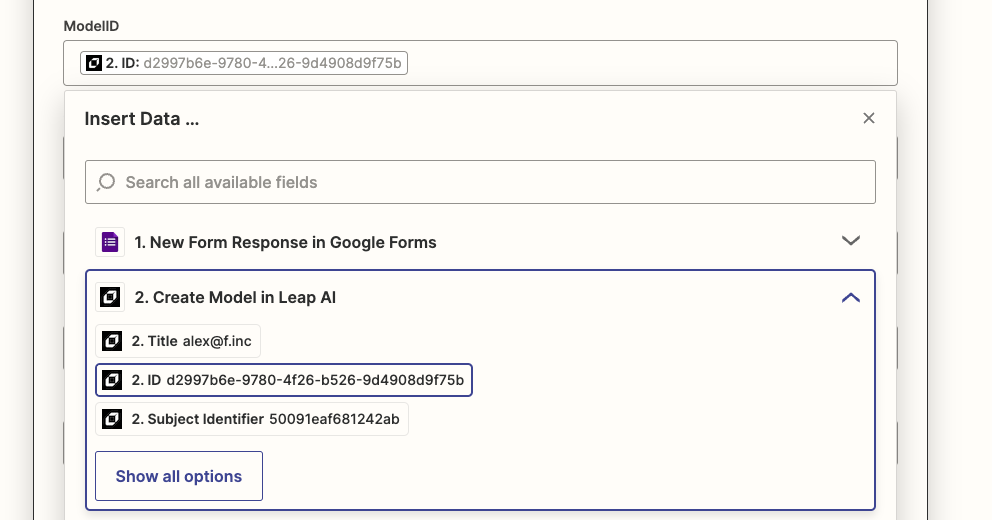
Make sure the ModelID is coming from the “Create Model in Leap AI” step
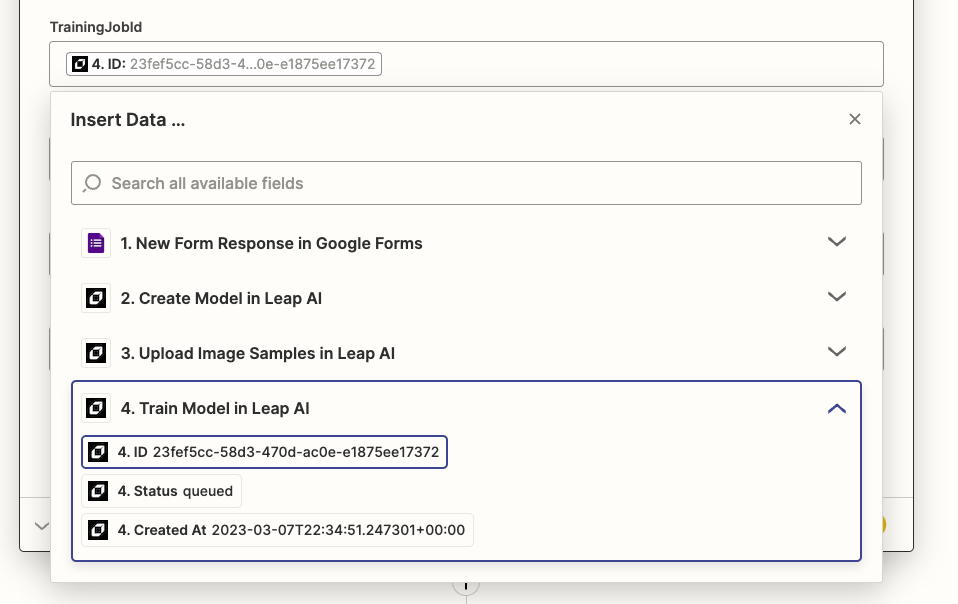
Make sure the TrainingJobId is coming from the “Train Model in Leap AI” step
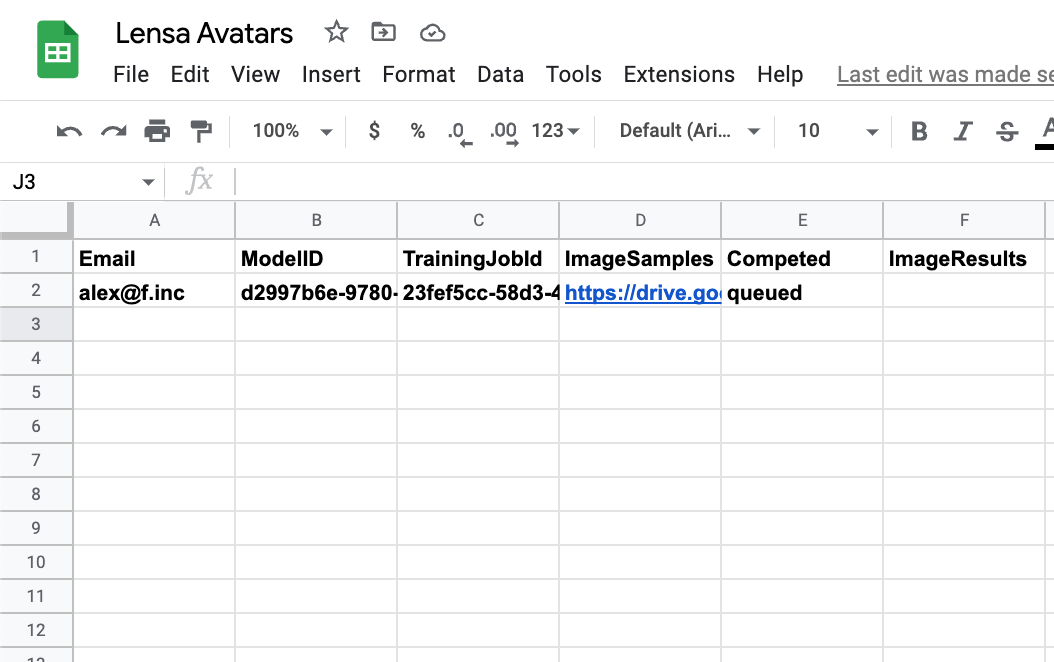
Test the Zap and you should see a similar output in your sheet. Make sure to publish your Zap once it is all working.
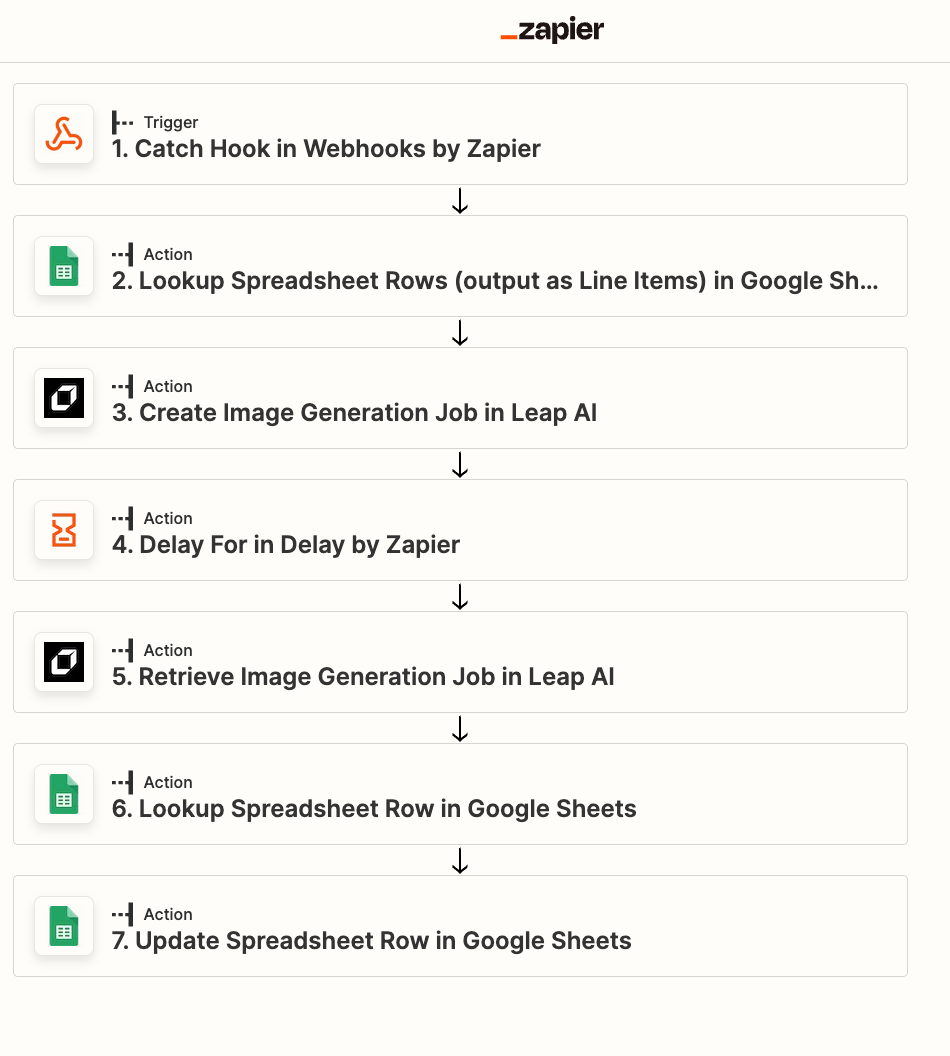
5️⃣ Zap #2 → Generating Images When Training Is Complete
Now, we’ll need to make a second Zap to generate images when the model is finishing training.
To know when it finishes, we need to provide a Webhook Url to the “Train A Model” step in our previous Zap, and then catch the Webhook as the first action in our current Zap.
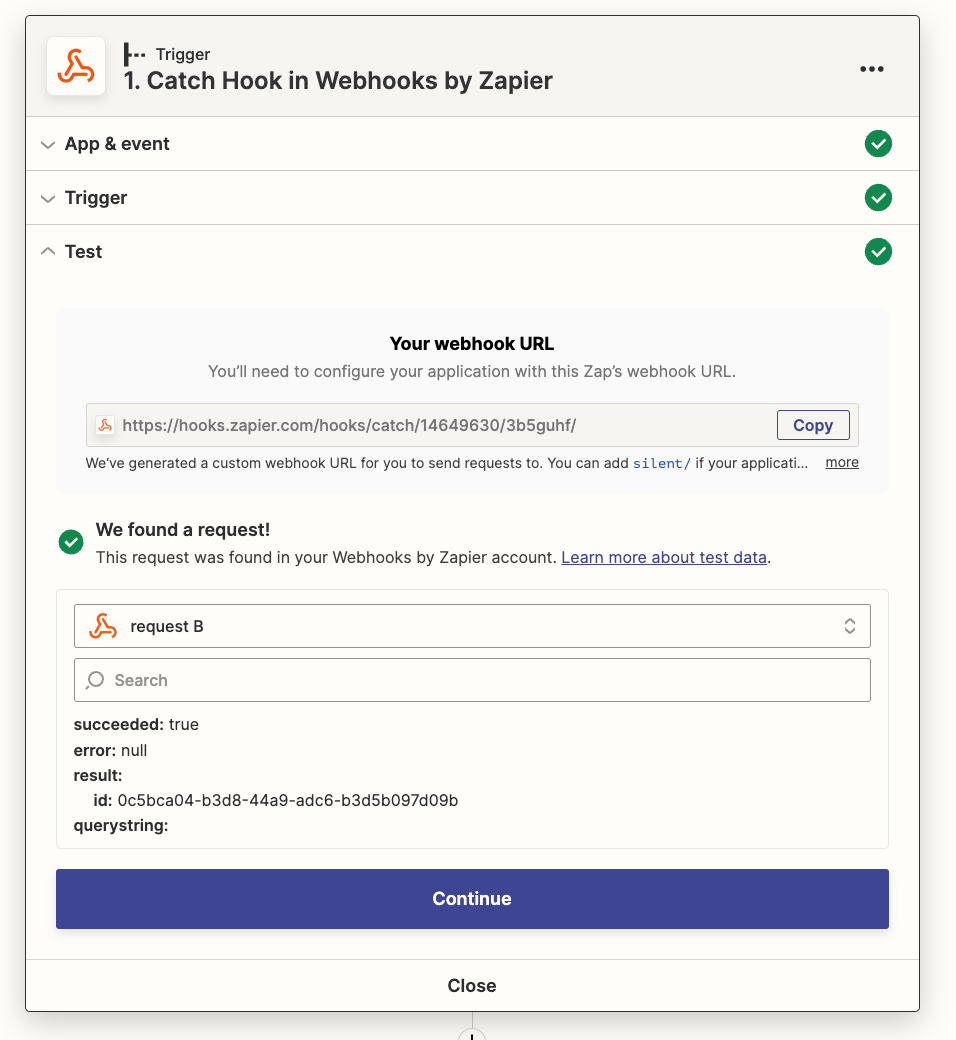
create a new Zap and “Catch Hook in Webhooks” action as the first step
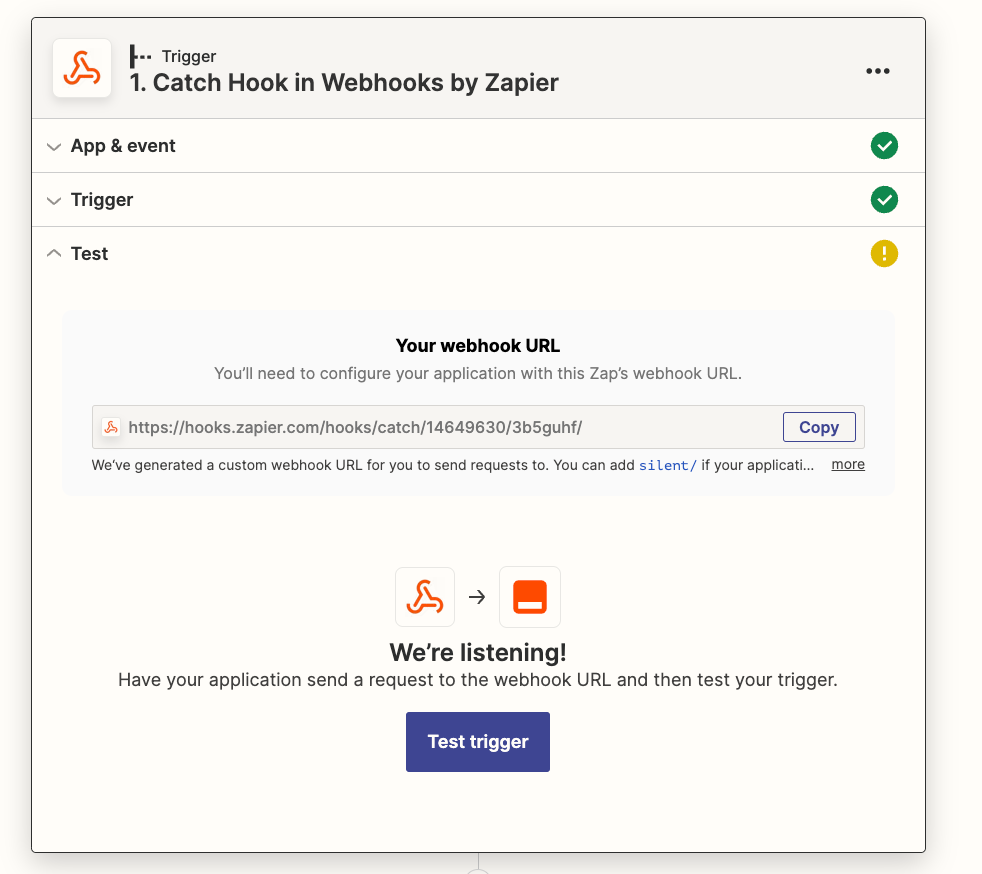
Copy the webhook URL and provide it as the Webhook Url in the “Train A Model” step in our previous Zap. This will be triggered when the model finishes training.
Re-test the “Train A Model” action so that the new Webhook we created will be triggered. In your Leap dashboard you should see a second training version processing.
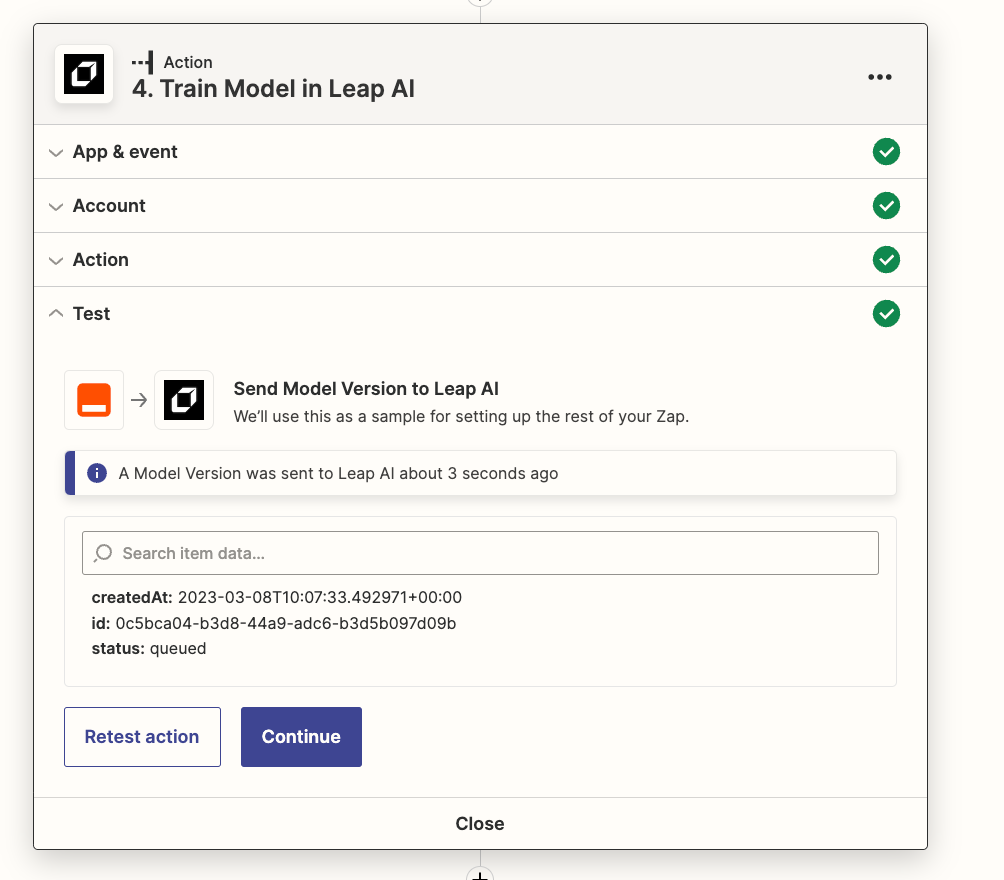
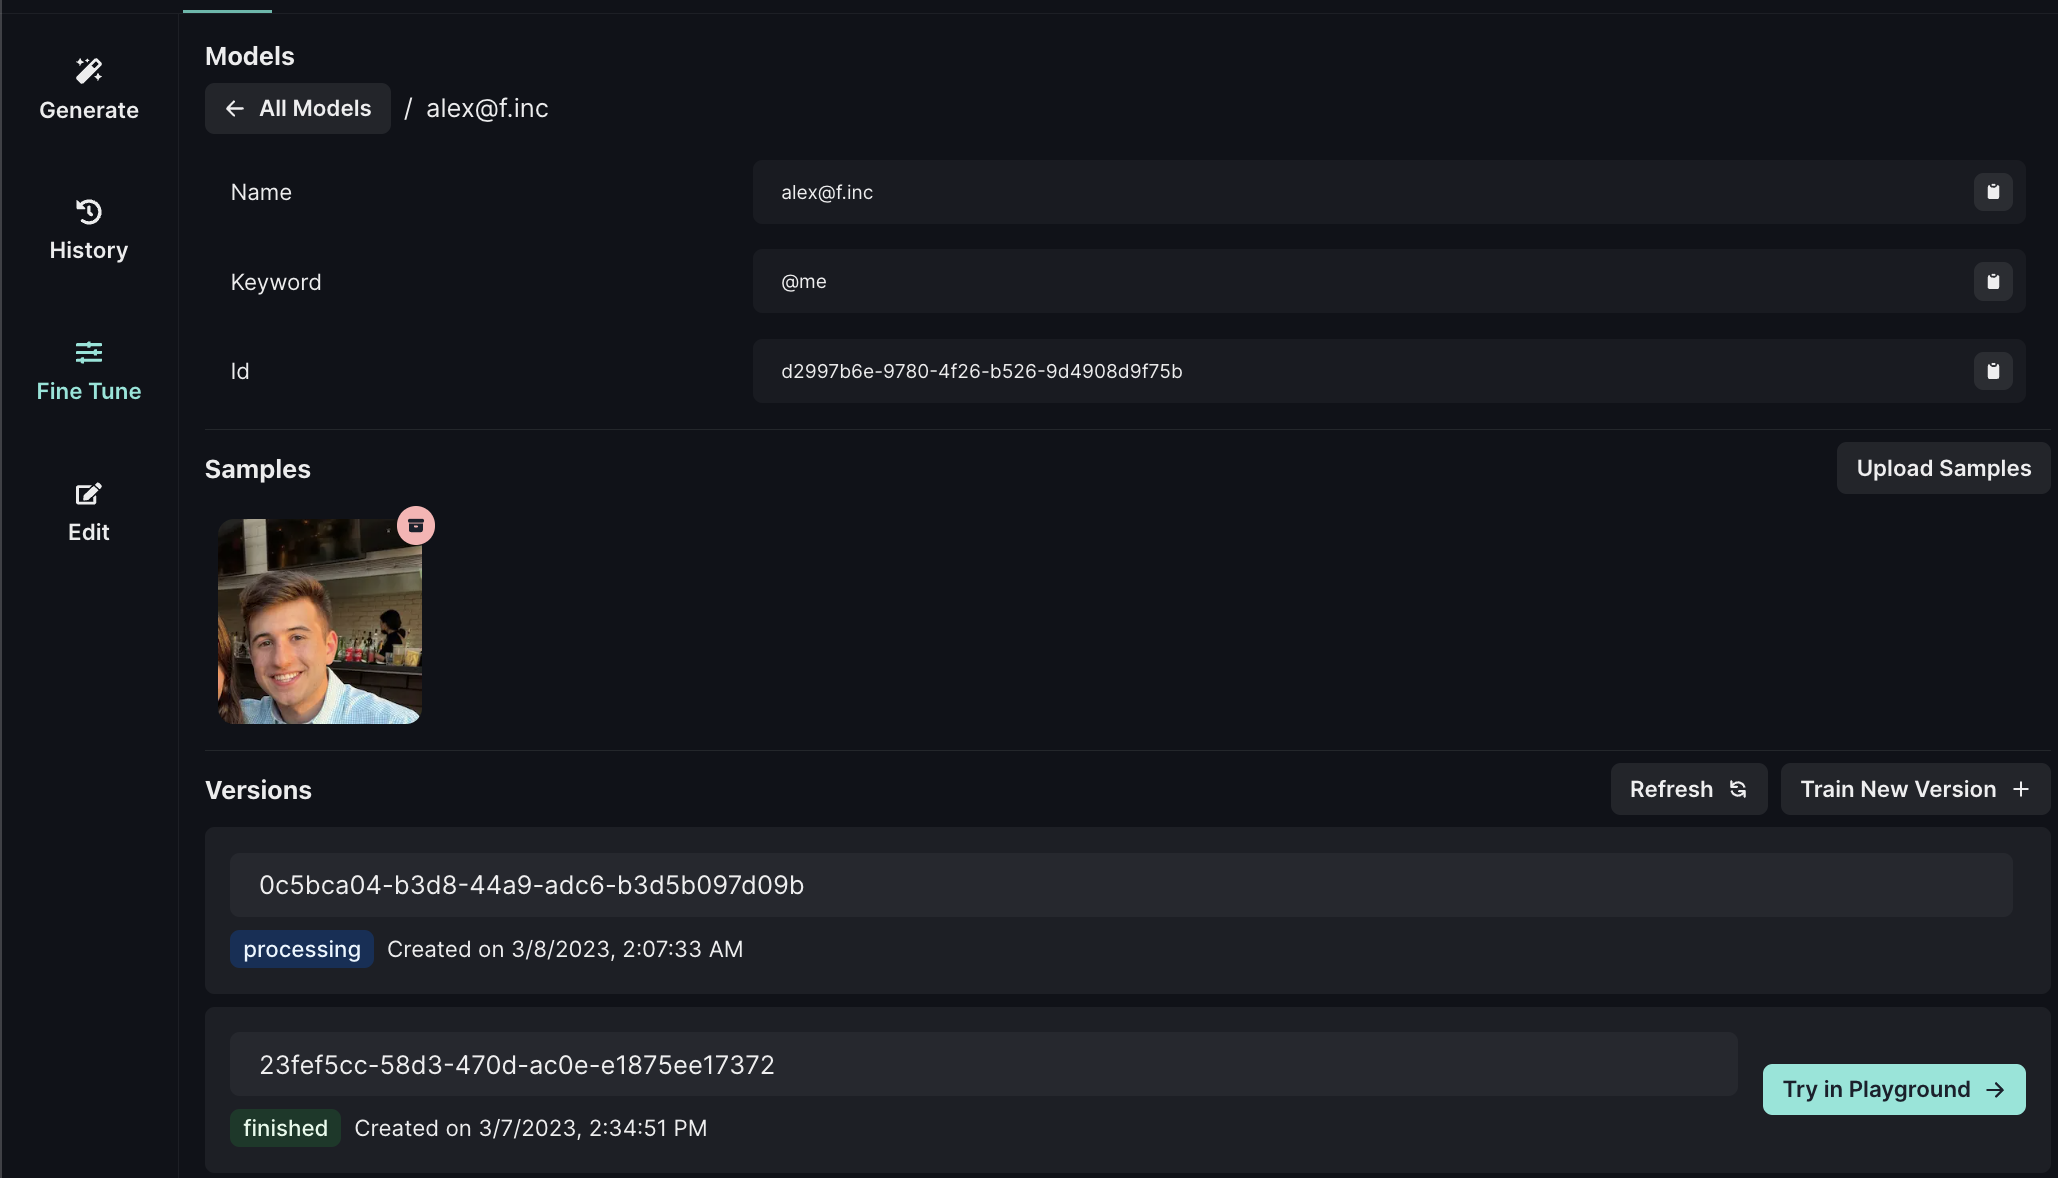
The training should take 15-20 minutes. Once it is finished, test that a request was found. The Webhook payload will return the model version ID.

Now, we’ll look up the TrainingJobID from Google Sheets in order to queue an Image Generation Job with Leap AI.
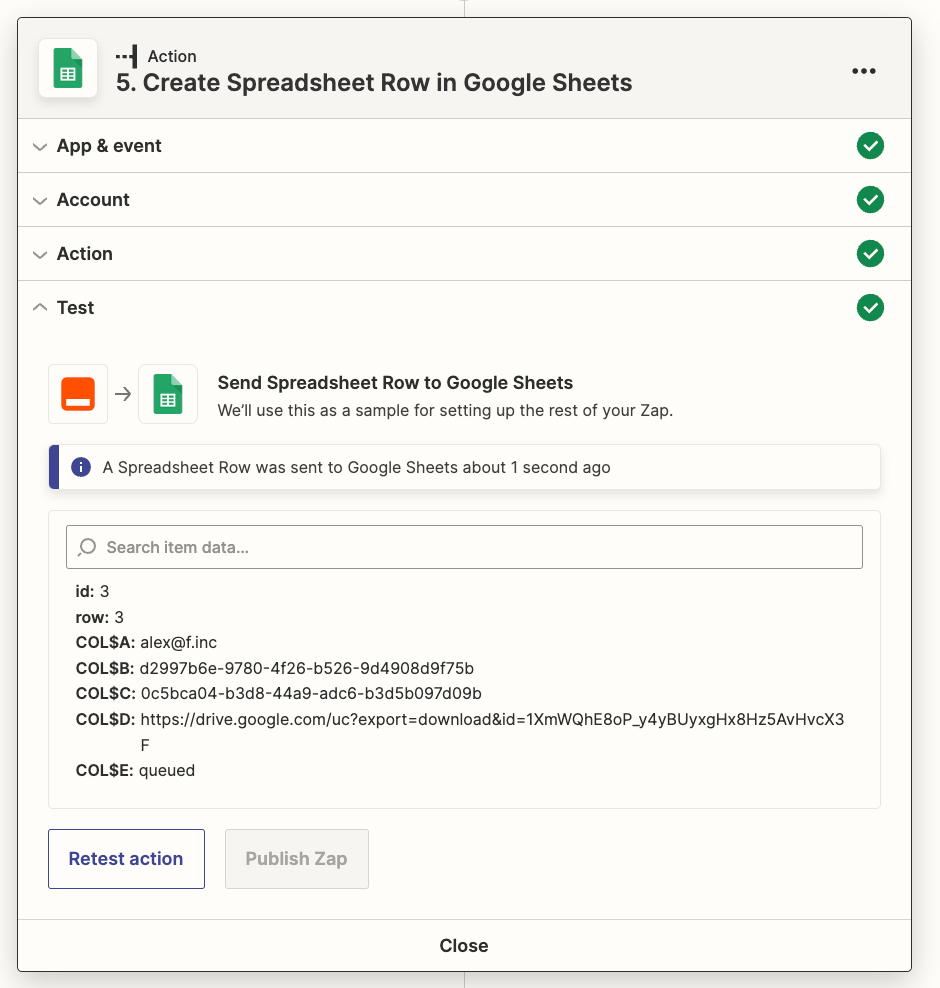
First, re-test the “Create Spreadsheet Row” action so that you have a new row with the updated model version id.
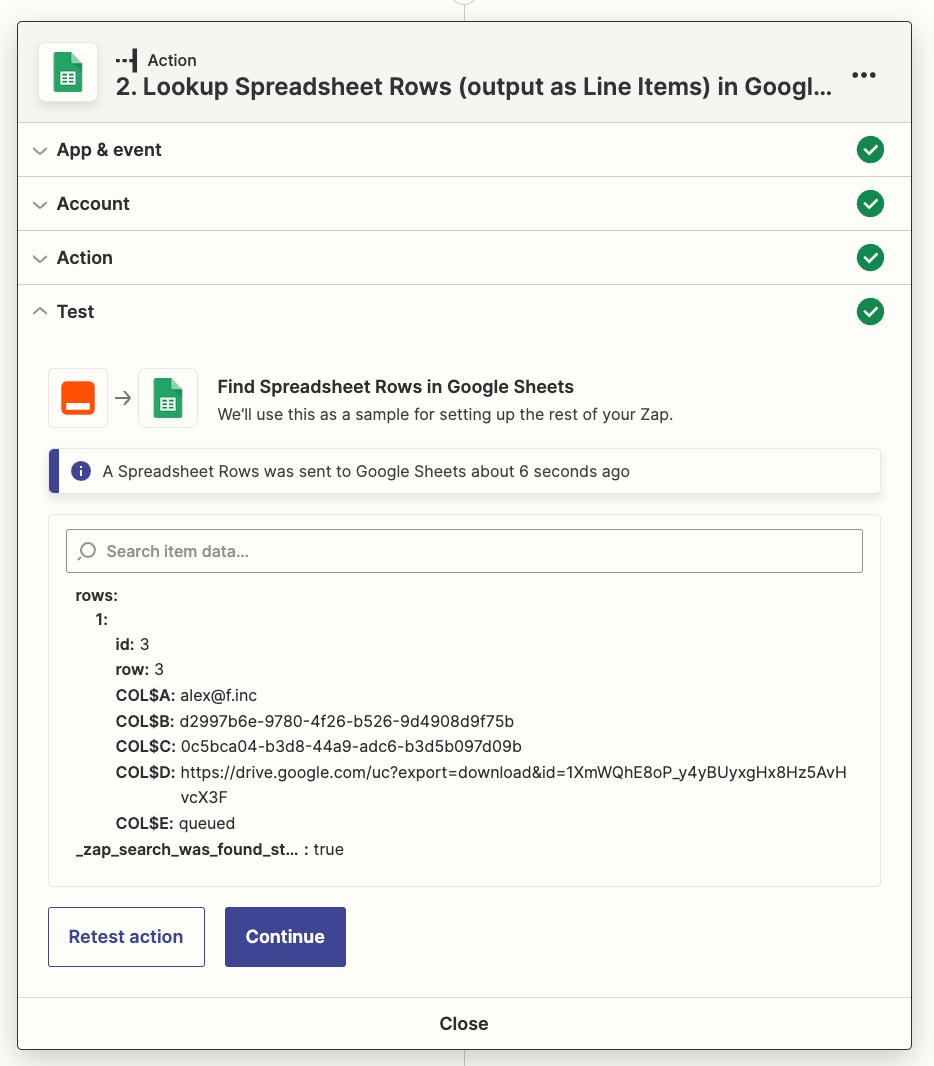
Now, add a “Lookup Spreadsheet Row” action where the Lookup Value is the TrainingJobID from the Webhook payload. Test to make sure the row is found.


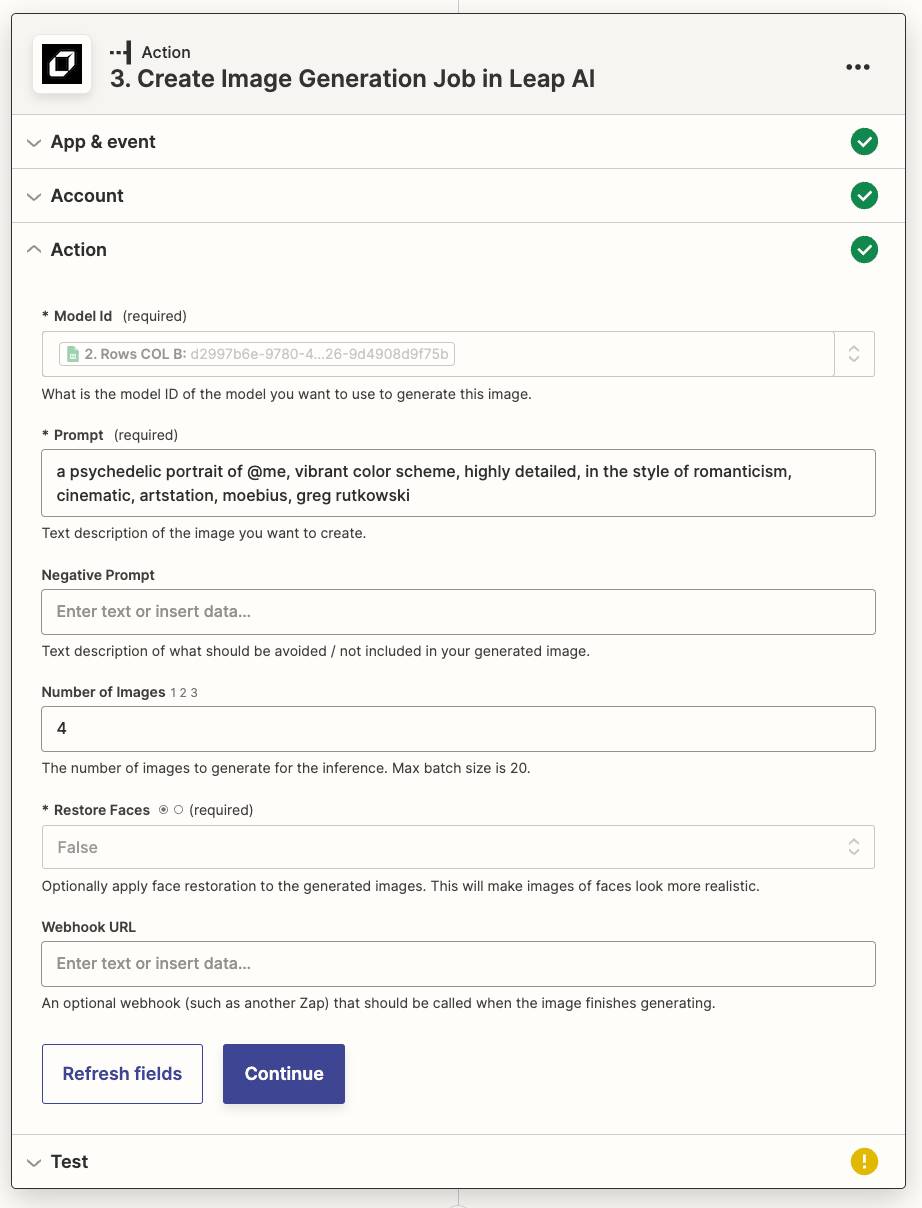
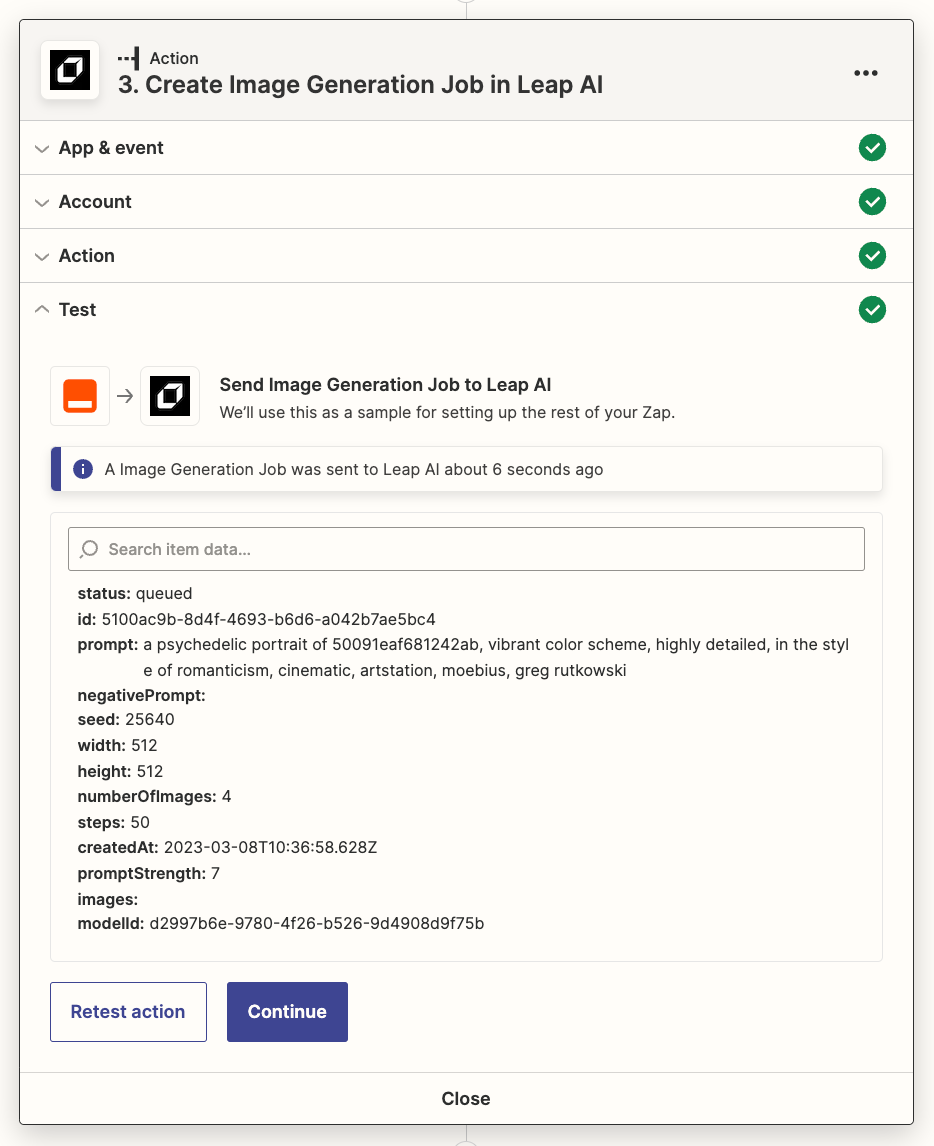
Next, Create Image Generation Job and use the ModelID value from Google Sheets lookup.
Use a prompt like “a psychedelic portrait of @me, vibrant color scheme, highly detailed, in the style of romanticism, cinematic, artstation, moebius, greg rutkowski”
Test the Zap and make sure you get a response like this:
Once we queue the Image Generation Job, we’ll set a time delay of 2 minutes, which should be plenty of time for the image to generate, before we retrieve the Image Generation Job.
An alternative to setting a time delay is to provide another Webhook URL that gets triggered when the job is done.
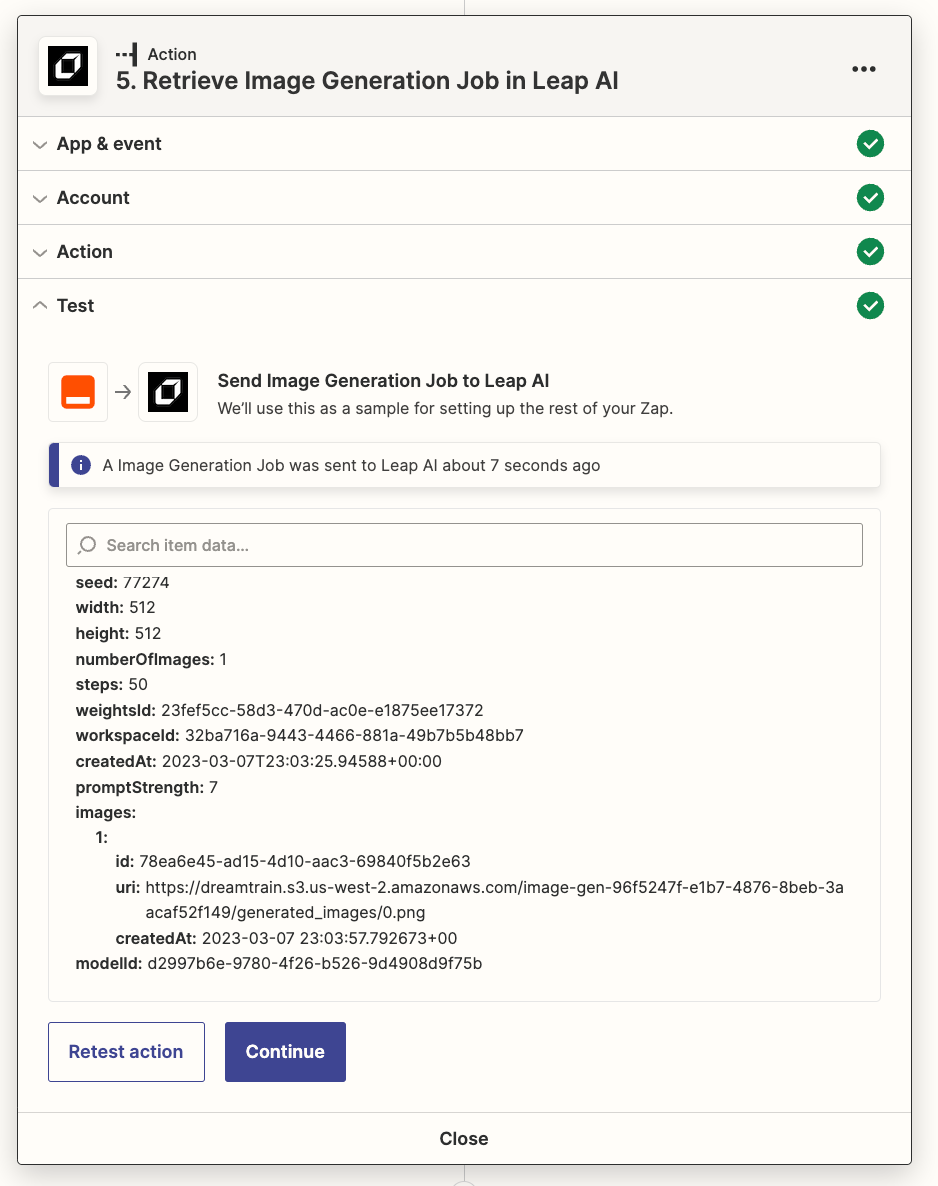
Retrieve the image and update Google Sheets with the resulting magic avatar image url!
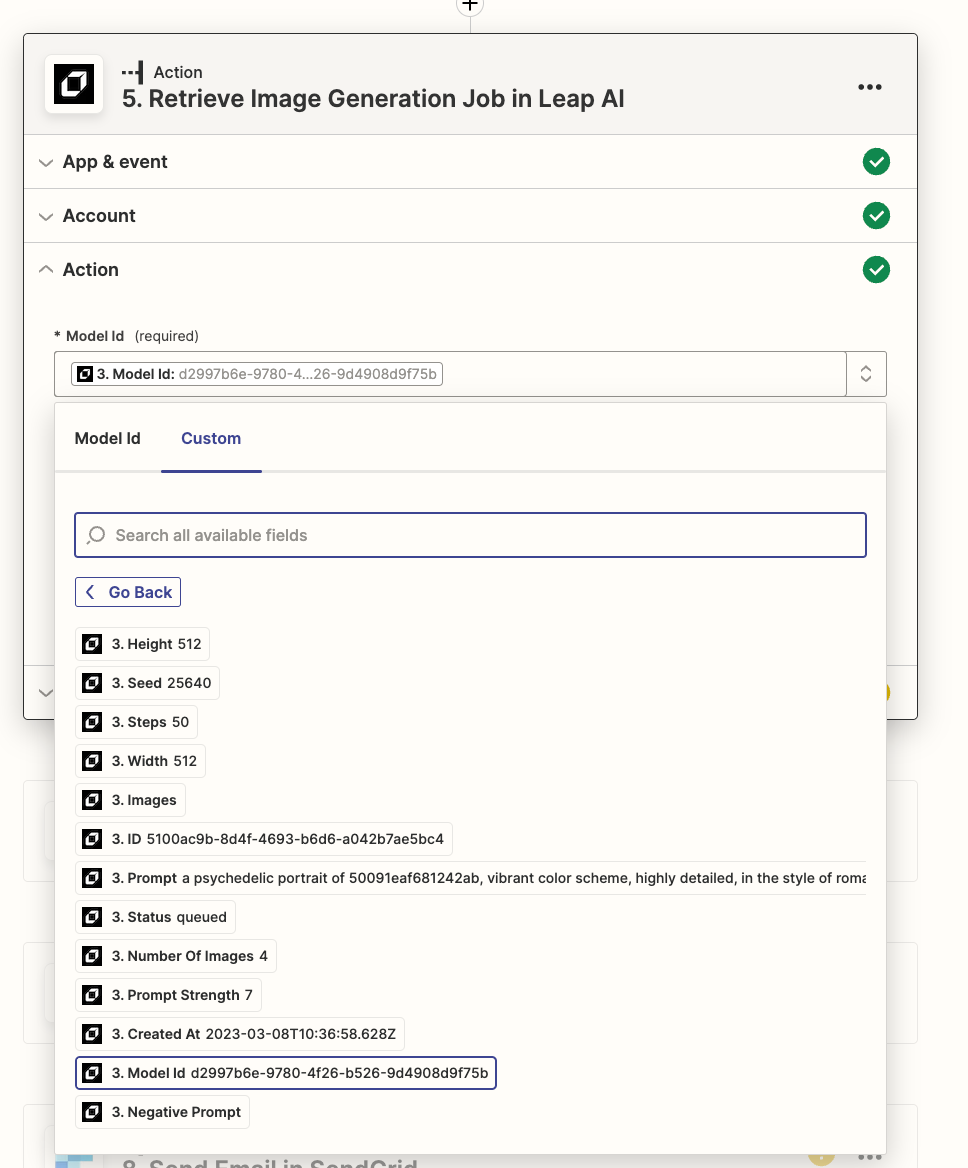
Use proper Model Id and Inference Id values from “Create Image Generation Job”

Test the Zap
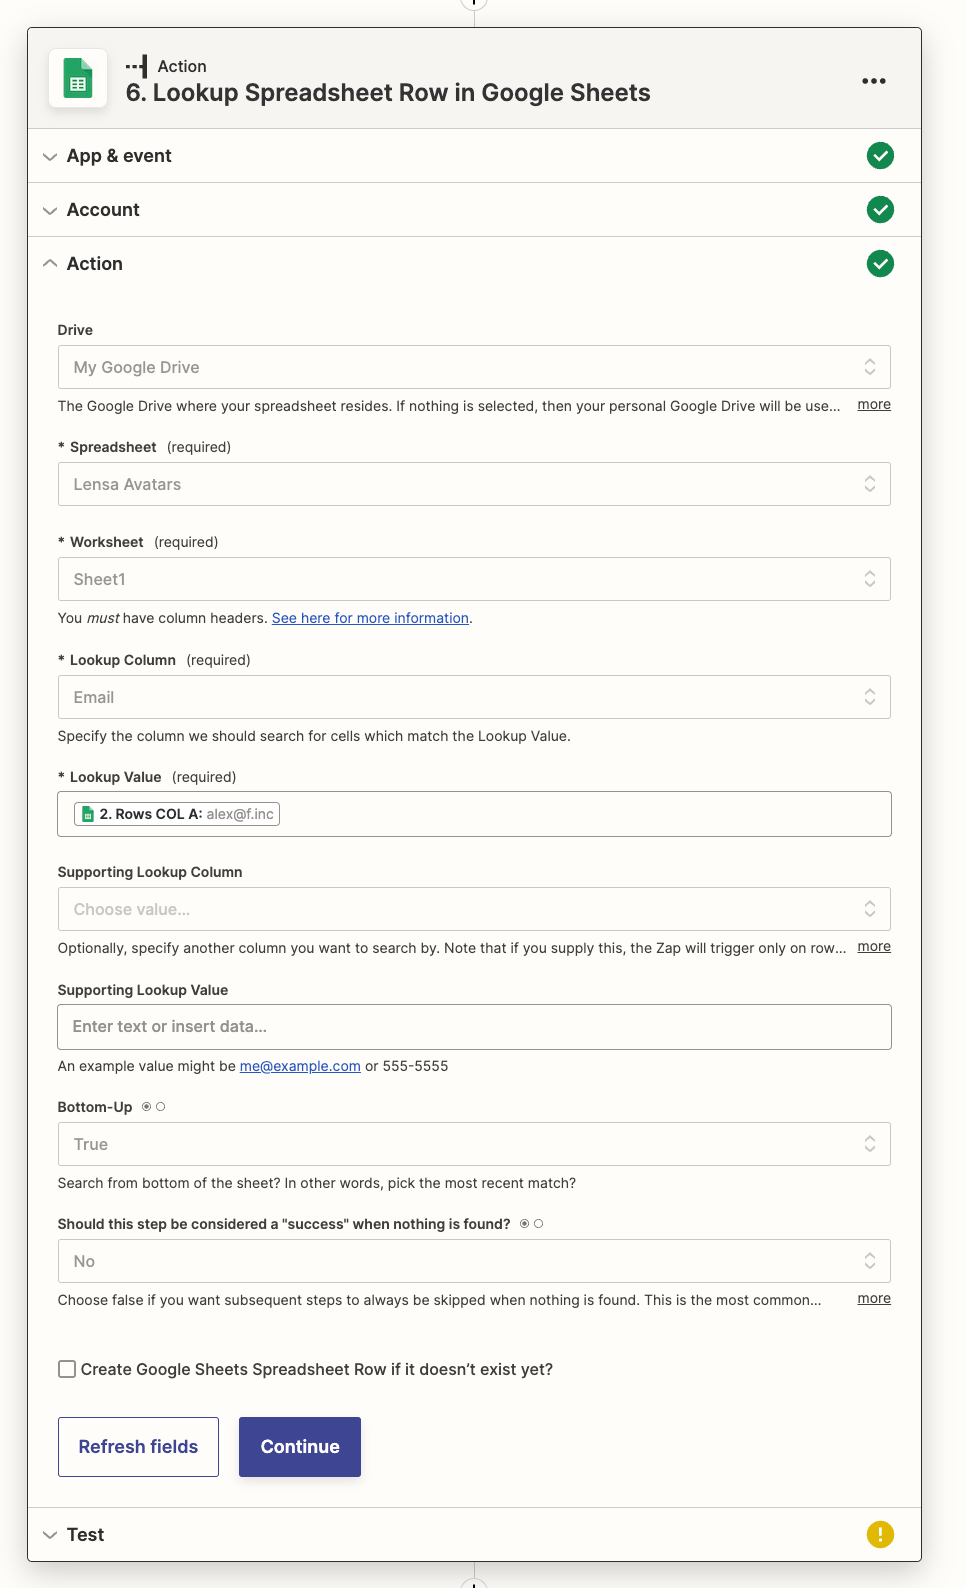
Lookup Spreadsheet Row using email value from step 2: “Lookup Spreadsheet Rows”
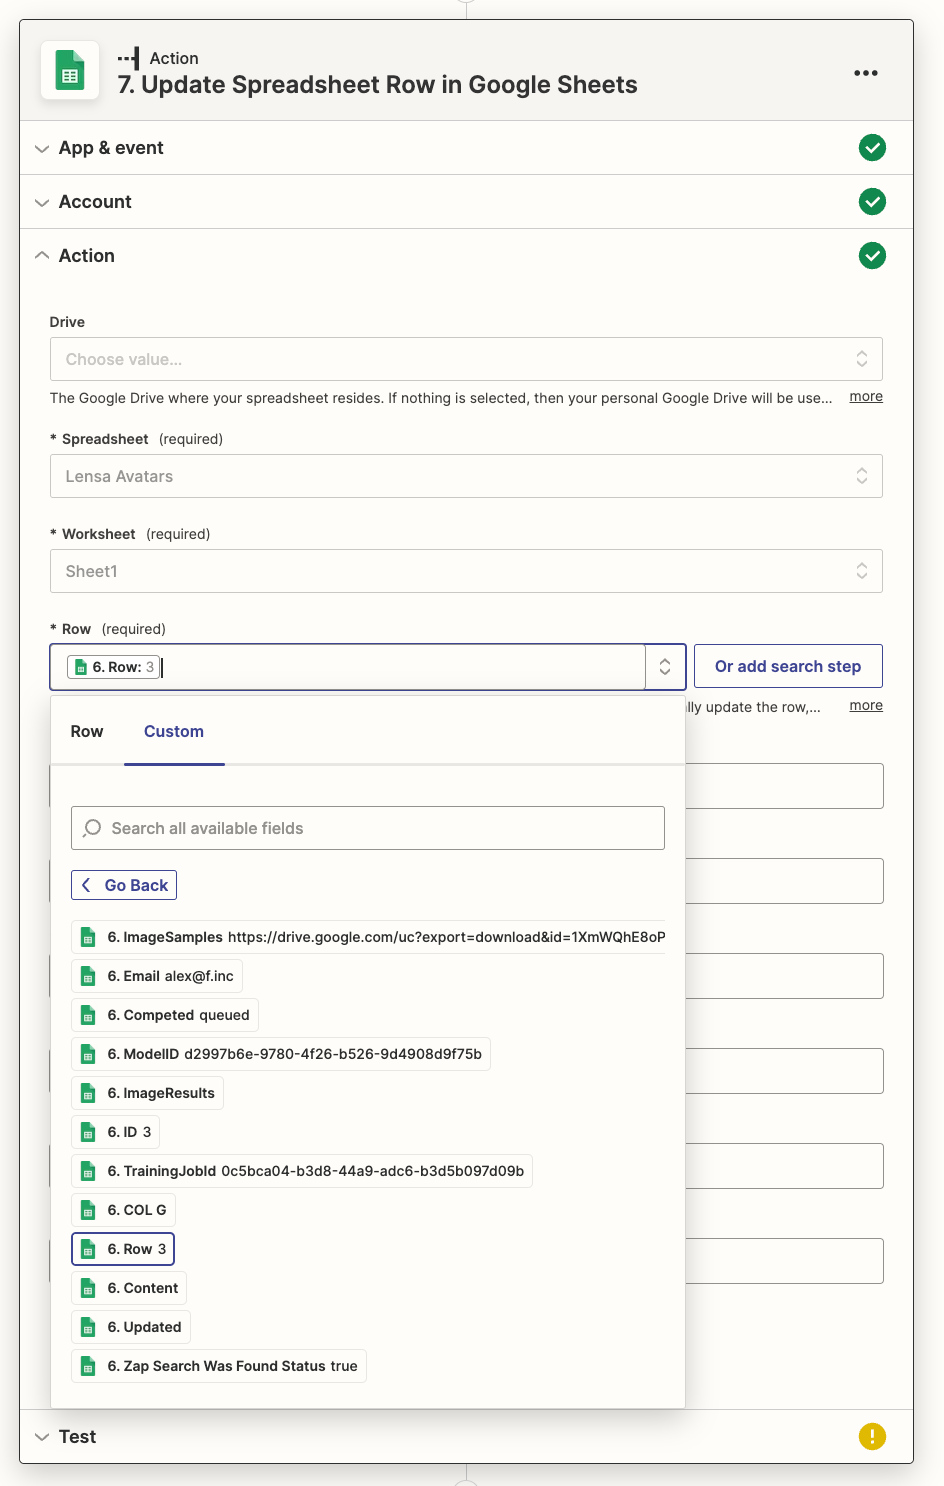
Update Spreadsheet Row in Google Sheets using Row value from step 6
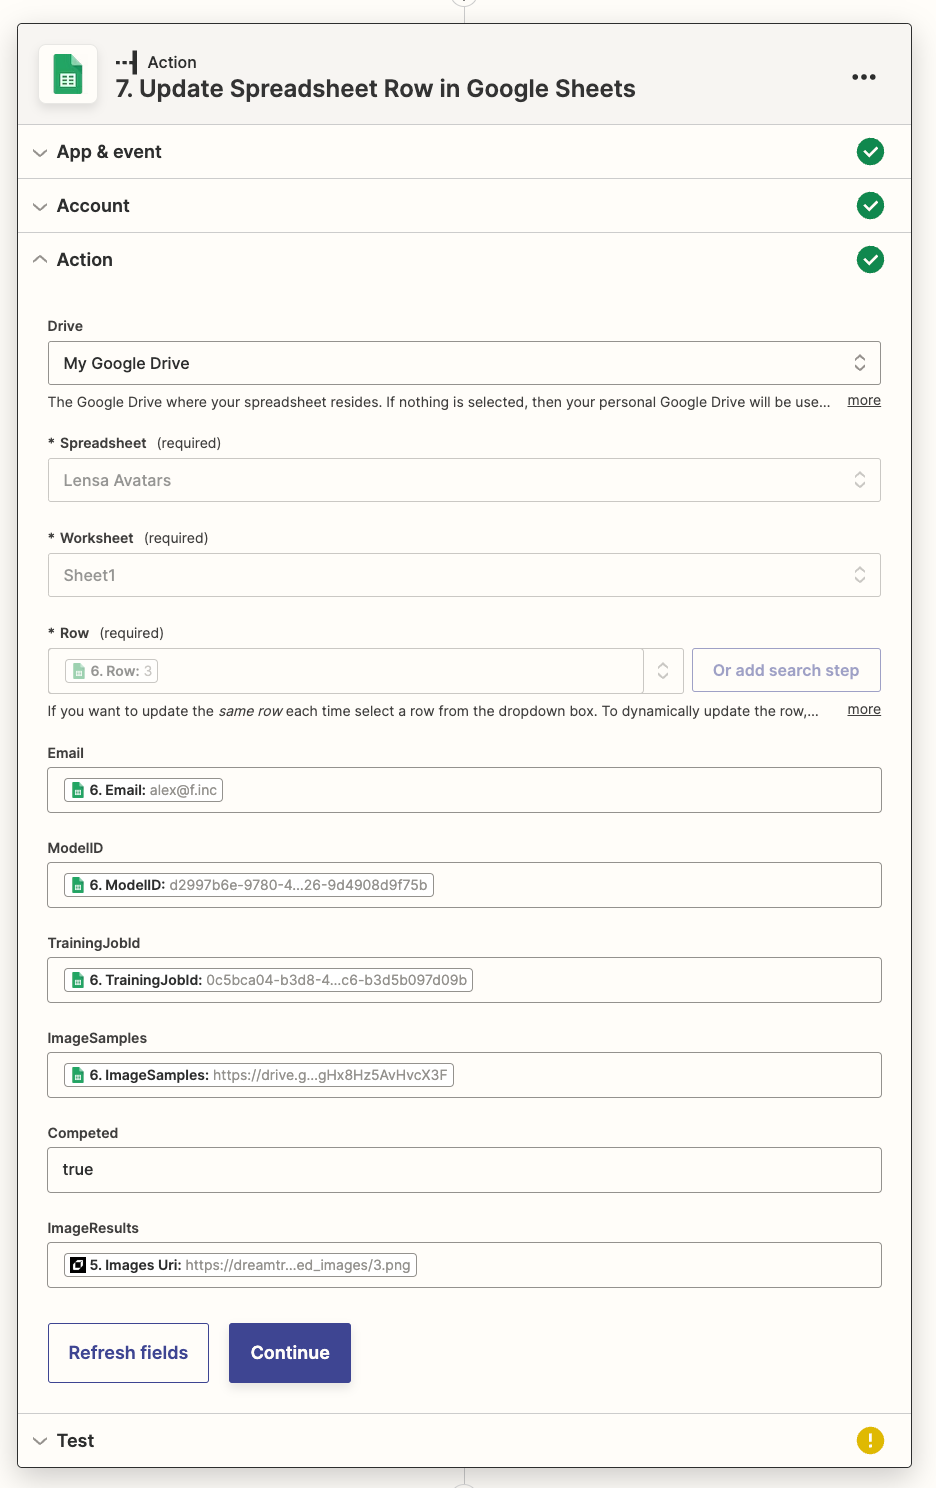
Update other row values using values from step 6. For ImageResults use Images Uri from step 5
Test the Zap and you should see your magic avatar image urls in your ImageResults! For multiple images, they are separated by commas.

Voila! 🥳

🔑 Additional Config
Congrats! You can now test your no code workflow that takes user form submissions, generates magic AI avatars on Leap!
Once you have the results in Google Sheets, you can email them to users, display them on no-code websites like Webflow, and more!
To take your project to the next level try experimenting with these prompts:
- Sci Fi → “8k detailed portrait of @me, futuristic sci-fi style, low-emission-neon, bladerunner movie scene style”
- Psychedelic → “a psychedelic portrait of @me, vibrant color scheme, highly detailed, in the style of romanticism, cinematic, artstation, moebius, greg rutkowski”
🏁 Workflow Summary
Here’s what the full workflow should look like at the end:
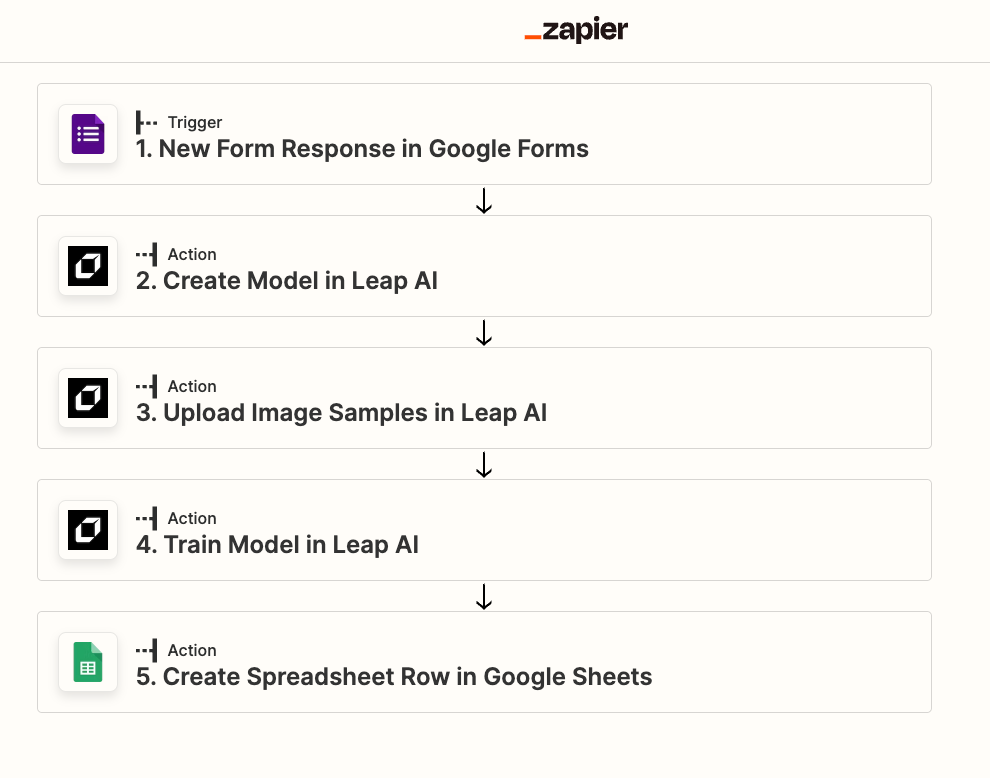
Zap #1
Zap #2
🚀 Wrapping Up
That's all for this guide!
Try it out for yourself and let us know if you have any questions. For additional support please join our discord.